Section 4: Setting Up Your WordPress Site (5 minutes)
General Settings
“Now that we’ve installed WordPress and are familiar with the dashboard, let’s configure some essential settings to personalize your site and ensure it functions correctly.
Step 1: Access General Settings
In the WordPress Dashboard, navigate to ‘Settings’ > ‘General’.
Step 2: Update Site Title, Tagline and SSL
Site Title:
This is the name of your website and appears in the browser title bar and in various locations depending on your theme.
For our demonstration, the site title is ‘Applegate Pumpkins’.
Update the Site Title:
Click on the ‘Site Title’ field and enter ‘Applegate Pumpkins’ (or your own site name).
Tagline:
A brief description or slogan that complements your site title.
It often appears in the header or footer of your site, depending on your theme.
Update the Tagline:
In the ‘Tagline’ field, enter a concise description of your site.
Example: ‘Organic Pumpkins, Grown with Love in Applegate Valley’.
SSL:
This is the where we can change the website to always encrypt traffic to the
Update the Site Address to SSL:
WordPress Address (URL)
Site Address (URL)
Step 3: Set Timezone and Date Formats
Timezone:
Setting the correct timezone ensures that your posts and pages display the correct publication times.
It’s also important for scheduling posts and managing time-sensitive content.
Update Timezone:
Scroll down to the ‘Timezone’ section.
Select your city or the nearest city in your timezone from the dropdown menu.
For example, if you’re in the Pacific Time Zone, you might select ‘Los Angeles’.
Date Format:
Choose how dates will appear on your site.
Update Date Format:
Under ‘Date Format’, select your preferred format.
You can choose one of the common options or enter a custom format.
Example: ‘F j, Y’ which displays as ‘October 15, 2023’.
Time Format:
Choose how times will appear on your site.
Update Time Format:
Under ‘Time Format’, select your preferred format.
Example: ‘g:i a’ which displays as ‘3:30 pm’.
Week Starts On:
Set the first day of the week for your site. This affects calendar widgets and other date-related functions.
Update Week Starts On:
Choose ‘Monday’ or ‘Sunday’ based on your preference.
Step 4: Save Changes
After updating the settings, click the ‘Save Changes’ button at the bottom of the page to apply the updates.
Permalinks Settings
“Next, we’ll configure the permalinks settings to ensure your site’s URLs are SEO-friendly and easy for visitors to read.
What Are Permalinks?
Permalinks are the permanent URLs to your posts, pages, and other content on your site.
Choosing a clear and descriptive permalink structure improves SEO and user experience.
Step 1: Access Permalink Settings
In the WordPress Dashboard, navigate to ‘Settings’ > ‘Permalinks’.
Step 2: Choose an SEO-Friendly URL Structure
You’ll see several options for permalink structures:
Plain: Default option with query strings (e.g., ‘?p=123’).
Day and Name: Includes the date and post name (e.g., ‘/2023/10/15/sample-post/’).
Month and Name: Includes the month and post name (e.g., ‘/2023/10/sample-post/’).
Numeric: Uses the post ID in the URL.
Post Name: Includes only the post name (e.g., ‘/sample-post/’).
Custom Structure: Allows you to define a custom URL structure.
Recommended Option:
Select ‘Post Name’:
This structure is clean, simple, and includes keywords from your post titles.
It’s user-friendly and preferred by search engines.
Step 3: Save Changes
After selecting ‘Post Name’, click the ‘Save Changes’ button at the bottom of the page.
Note:
Changing permalinks on an established site can cause broken links. Since we’re setting this up on a new site, it’s the perfect time to configure this setting.
Engagement Opportunity
“Configuring these settings may seem minor, but they have a significant impact on your site’s professionalism and accessibility.
Site Title and Tagline:
Think about how you want your site to be perceived.
A compelling tagline can engage visitors and convey your site’s purpose immediately.
Timezone and Date Formats:
Ensure your content scheduling aligns with your local time.
This is particularly important if you plan to publish content regularly or have events.
Permalinks:
An SEO-friendly URL structure helps search engines index your content effectively.
It also makes your URLs more readable and shareable.
Personal Insights
“For Applegate Pumpkins, setting the site title and tagline helps visitors immediately understand the site’s focus on celebrating the harvest in our local community.
By choosing the ‘Post Name’ permalink structure, our blog posts and pages will have clean, descriptive URLs like ‘applegatepumpkins.com/fall-festival/’, which is both user-friendly and good for SEO.
Transition to Next Section
“With these foundational settings in place, our WordPress site is now personalized and optimized for both visitors and search engines. Next, we’ll choose and install a theme to define our site’s appearance. We’ll be using the ‘Hello Elementor’ theme, which integrates seamlessly with Elementor and provides a flexible foundation for our design.”
“Now that we’ve selected our domain and hosting, it’s time to install WordPress. Since I’m using RunCloud to manage our server for this demonstration, I’ll show you how to install WordPress using RunCloud’s interface.
Demonstration: Installing WordPress with RunCloud
Step 1: Log In to RunCloud Dashboard
Navigate to manage.runcloud.io and log in to your account.
Step 2: Create a New Web Application
In the RunCloud dashboard, select your server from the list.
Click on ‘Web Applications’ in the left-hand menu.
Click the ‘Create Web Application’ button.
Step 3: Configure Your Web Application
Domain Name: Enter your domain name, e.g., applegatepumpkins.com.
Web Application Name: This can be the same as your domain or any identifier you prefer.
Web Application Type: Select ‘WordPress’ from the dropdown menu. This will automate the WordPress installation process.
System User: Use the default user or create a new one if you prefer.
Step 4: Install WordPress
Review your settings and click ‘Add Web Application’.
RunCloud will now set up the web application and install WordPress automatically.
Step 5: Advanced Options
Enable SSL Certificate: You can set up an SSL certificate now or later. For this demonstration, we’ll use the default options.
Step 6: Site Information
Site Title: Enter Applegate Pumpkins.
Username: Create an admin username (avoid using ‘admin’ for security reasons).
Password: Generate a strong password.
Your Email: Enter your email address.
Click ‘Deploy applegatepumpkins’.
Step 7: Access Your WordPress Site
Once the installation is complete, you can access your site by navigating to applegatepumpkins.com in your web browser.
This is the default WordPress theme Twenty Twenty-Four. Yay! It looks like everything is working.
Manual Installation (Simplified Overview)
“While we used RunCloud’s automated process to install WordPress, it’s helpful to understand the basic steps involved in a manual installation, even if we won’t go into much detail.
Simplified Steps for Manual Installation:
Download WordPress:
Go to wordpress.org and download the latest version of WordPress.
Upload Files to Server:
Use the webhosts File Manager or an FTP client to upload the WordPress files to your web application’s root directory.
Create a Database:
Click on ‘Database’ and create a new database.
Note down the database name, username, and password.
Configure wp-config.php:
Rename wp-config-sample.php to wp-config.php.
Edit the file to include your database details.
Save the changes.
Run the WordPress Installation Script:
Navigate to yourdomain.com in your web browser.
Follow the on-screen instructions to complete the setup.
Why Understand Manual Installation?
Awareness: Knowing these steps gives you a deeper understanding of how WordPress works.
Troubleshooting: It can help you diagnose issues that may arise during installation or updates.
Flexibility: Allows for custom configurations not available through automated installers.
Exploring the WordPress Dashboard
“With WordPress installed, let’s log in to the WordPress Dashboard and familiarize ourselves with its key sections.
Accessing the Dashboard:
Go to Applegatepumpkins/wp-admin.
Enter your admin username and password.
Click ‘Log In’.
Dashboard Overview:
Dashboard Home:
At a Glance: Provides an overview of your site’s content and WordPress version.
Activity: Shows recent posts, comments, and other activities.
Quick Draft: Allows you to quickly write a new post draft.
Posts:
All Posts: View, edit, or delete existing blog posts.
Add New: This is where you would create a new blog post.
Categories and Tags: Organize your posts for better navigation and SEO.
Media:
Library: Manage your uploaded images, videos, and other media files.
Add New: Upload new media files.
Pages:
All Pages: View, edit, or delete existing pages.
Add New: Create a new page (e.g., ‘About Us’, ‘Contact’).
Comments:
Moderate comments left by visitors.
Approve, reply, edit, or mark comments as spam.
Appearance:
Themes: Install, activate, or customize themes.
Customize: Access the Theme Customizer to adjust site identity, colors, menus, widgets, and more.
Widgets: Add content to sidebars, footers, or other widget-ready areas.
Menus: Create and manage navigation menus.
Plugins:
Installed Plugins: View and manage installed plugins.
Add New: Install new plugins to extend your site’s functionality.
Users:
All Users: Manage user accounts.
Add New: Create new users and assign roles (e.g., Administrator, Editor, Author).
Your Profile: Edit your personal profile settings.
Tools:
Available Tools: Access tools like category and tag converters.
Import/Export: Import content from other platforms or export your site’s content.
Settings:
General: Set site title, tagline, WordPress address, admin email, timezone.
Writing, Reading, Discussion: Configure post settings, homepage display, and comment settings.
Media: Define default image sizes.
Permalinks: Customize URL structures for posts and pages.
Live Walkthrough:
Dashboard Home:
Highlight the ‘At a Glance’ section showing your site’s basic info.
Point out the ‘Site Health Status’ for important notifications.
Creating a New Post:
Navigate to Posts > Add New.
Briefly demonstrate the Gutenberg block editor interface.
Media Library:
Show how to upload images.
Discuss the importance of alt text for accessibility and SEO.
Customizing Appearance:
Go to Appearance > Themes.
Show the default themes and explain that we’ll be installing ‘Hello Elementor’ in the next section.
Tips:
Help and Screen Options:
Point out the ‘Help’ and ‘Screen Options’ tabs at the top-right corner for additional guidance and customization.
User Roles:
Explain the different user roles and their permissions, which is important if others will contribute to your site.
Engagement Opportunity:
“Consider how you’ll use these features for your own website. For example, if you’re planning a blog, you’ll spend a lot of time in the Posts section. If you’re showcasing photography, the Media and Pages sections will be crucial.”
Transition to Next Section:
“Now that WordPress is installed using RunCloud and we’re comfortable navigating the dashboard, it’s time to configure some essential settings and choose a theme that will define our site’s look and feel. In the next section, we’ll set up our site information and install the ‘Hello Elementor’ theme to prepare for designing our pages with Elementor.”
Section 2: Understanding Domains and Hosting (5 minutes)
What is a Domain?
“Let’s begin with the concept of a domain name. Think of the domain as your website’s street address on the internet—it tells people where to find you.
Definition: A domain is the unique name that appears in a URL to identify a website. For example, in www.yourwebsite.com, ‘yourwebsite.com’ is the domain name.
Purpose: It serves as a memorable and readable way for users to access your website, rather than using an IP address, which is a string of numbers.
Extensions: Domains come with various extensions like .com, .org, .net, .io, and many more. Each can serve different purposes, but .com is the most widely recognized.”
What is Hosting?
Next, let’s talk about web hosting, the foundation that allows your website to be accessible on the internet.
Definition: Hosting is a service that stores all your website’s files, images, and content on a server connected to the internet. When someone types your domain name into their browser, the internet connects to the server hosting your site and delivers your web pages to them.
Types of Hosting Services:
Shared Hosting: Your website shares server resources with other sites—cost-effective but can be slower during high traffic.
Virtual Private Server (VPS): Offers dedicated portions of a server’s resources—better performance than shared hosting.
Dedicated Hosting: An entire server dedicated to your website—ideal for large websites with high traffic.
Managed WordPress Hosting: Specifically optimized for WordPress sites, often includes additional services like automatic updates and enhanced security.
Why Hosting Matters:
Performance: A reliable host ensures your website loads quickly, enhancing user experience.
Uptime: Refers to the time your website is online and accessible—look for hosts that guarantee at least 99.9% uptime.
Security: Good hosting providers offer security features like SSL certificates, malware scanning, and automatic backups.”
Choosing a Domain and Hosting Provider
“Selecting the right domain name and hosting provider is crucial for your website’s success. Here are some tips to guide you:
Tips for Choosing a Domain Name:
Keep It Simple and Memorable:
Short, easy-to-spell names are more likely to be remembered and revisited.
The name should give visitors an idea of what your website is about.
If your site is about photography, a domain like www.lensview.com could be fitting.
Choose the Right Extension:
.com is the most popular and easiest to remember.
Consider other extensions if the .com version is not available, but ensure it suits your site’s purpose.
Avoid Numbers and Hyphens:
These can confuse users and are harder to convey verbally.
Tips for Selecting a Hosting Provider:
Reliability and Uptime:
Opt for providers with a proven track record of high uptime (99.9% or higher).
Read customer reviews to gauge reliability.
Security Features:
Look for features like SSL certificates, firewalls, and regular malware scans.
Regular backups are essential in case you need to restore your site.
Customer Support:
24/7 customer support can be invaluable, especially when issues arise.
Support through multiple channels (live chat, email, phone) is a plus.
Scalability:
Choose a host that can grow with you. As your website gains more traffic, you’ll need more resources.
Performance Enhancements:
Providers that offer solid-state drives (SSDs) and caching can improve your site speed.
Integration with Content Delivery Networks (CDNs) like Cloudflare can further enhance performance.
Pricing and Value for Money:
Compare what’s included in the price—sometimes paying a little more gets you significant benefits.
Be cautious of low initial prices that skyrocket upon renewal.
Our Recommendations:
Elementor Hosting Basic Plan:
When you build your own website, I recommend starting with the Elementor Hosting Basic Plan.
Benefits:
All-in-One Solution: Includes hosting with WordPress pre-installed.
Optimized for Elementor: Ensures compatibility and smooth performance.
Beginner-Friendly: Simplifies the setup process, allowing you to focus on building your website without managing server configurations.
Cloudflare Integration:
We recommend integrating Cloudflare to enhance your website’s security and speed.
Features:
Content Delivery Network (CDN): Distributes your content across global servers, reducing load times for international visitors.
DDoS Protection: Protects your site from malicious attacks.
SSL/TLS Encryption: Encrypts data between your site and its visitors, building trust and improving SEO.
Personal Insights:
“For this presentation, I’m using Popproxx web hosting that’s built on RunCloud to self-host our demonstration website. This setup provides me with the flexibility and control needed for our session today.
When choosing a domain name for the presentation, I wanted something that would resonate with all of you and be easy to remember. Since we’re in the Applegate Valley and it’s October—a time when pumpkins are everywhere—I decided to go with applegatepumpkins.com.
Selecting applegatepumpkins.com serves a couple of purposes:
Local Connection: It reflects our beautiful Applegate Valley, making it relatable to our community.
Seasonal Relevance: October is synonymous with pumpkins, adding a timely and festive touch.
This choice demonstrates how you can pick a domain that’s both meaningful and memorable for your audience. It ties in the local flavor and the season, making it more engaging for visitors.
While I’m using a self-hosted solution with Popproxx and RunCloud for this demonstration, I recommend starting with the Elementor Hosting Basic Plan when you build your own website. It’s an all-in-one solution that’s beginner-friendly, includes hosting with WordPress pre-installed, and is optimized for use with Elementor. This makes it a great choice to get you up and running quickly without the need to manage your own hosting environment.”
Engagement Opportunity:
“Think about what you might name your own website. Is there something unique about your location, interests, or the time of year that you could incorporate into your domain name? While we won’t be registering domains today, it’s a great exercise to start considering your options and see how they can make your site more personal and engaging.”
Transition to Next Section:
“Now that we’ve discussed the essentials of domains and hosting and I’ve shared how I’m using applegatepumpkins.com for our demonstration, we’re ready to move on to setting up WordPress. In the next section, I’ll show you how to get WordPress up and running quickly. We’ll use my self-hosted setup for the demonstration, but remember that the Elementor Hosting Basic Plan can simplify this process when you’re building your own site.”
“Hello everyone! Welcome to our class on ‘Building Your First Website with WordPress and Elementor.’ I’m Jamin Giersbach, and I’m excited to have you join me today. Over the next hour, I’ll be demonstrating how to build a website from scratch using WordPress and Elementor. Whether you’re aiming to start a personal blog, showcase your portfolio, or establish an online presence for your business, this session will provide you with the foundational knowledge to get started.”
Outline What Will Be Covered:
“Here’s what we’ll cover during this class:
Introduction – We’ll begin with an overview of WordPress and Elementor.
Understanding Domains and Hosting – Learn what they are and why they’re essential.
Setting Up WordPress with Elementor Hosting – We’ll set up WordPress using the Elementor Hosting Basic Plan.
Configuring Your WordPress Site – I’ll walk you through the key settings.
Choosing and Installing a Theme – We’ll install the ‘Hello Elementor’ theme.
Building Pages with Elementor – Watch as I create a homepage and additional pages using Elementor.
Setting Up Navigation Menus – See how to create menus for easy site navigation.
Final Touches and Launching Your Site – We’ll prepare the site for launch.
Q&A and Next Steps – I’ll answer any questions you have and provide resources for further learning.
By the end of this class, you’ll have seen the complete process of building a website using WordPress and Elementor, equipping you with the knowledge to start creating your own site when you’re ready.
Facts about WordPress
Dominance in the Web World:
“As of 2023, WordPress powers over 40% of all websites on the internet. That’s nearly half of the web! From personal blogs to major corporate sites, WordPress is the go-to platform for millions due to its flexibility and robust features.”
Open-Source and Free:
“WordPress is an open-source Content Management System (CMS), which means it’s free to use and constantly improved by a global community of developers. This collaborative environment gives you access to thousands of plugins and themes to enhance your website’s functionality and appearance.”
User-Friendly:
“Designed with both beginners and experts in mind, WordPress makes it easy to create and manage a website without needing extensive technical knowledge.”
Facts about Elementor
Leading Page Builder:
“Elementor is a powerful WordPress page builder with over 5 million active installations. It allows you to design custom web pages using a drag-and-drop interface, so you don’t need to know how to code to create a professional-looking website.”
Design Flexibility:
“With Elementor, you can achieve pixel-perfect designs with ease. It offers a wide range of widgets and templates that cater to various design needs, making the creation process both intuitive and enjoyable.”
Elementor Hosting Basic Plan:
“In this class, we’ll use the Elementor Hosting Basic Plan, which provides an all-in-one solution for beginners. It includes WordPress hosting and access to Elementor’s essential features, making it a convenient choice to get your website up and running quickly.”
Setting Expectations
“Throughout this session, I’ll be building a website step-by-step, and you’ll be able to watch the entire process. This approach allows you to focus on understanding each part without the pressure of following along simultaneously. I encourage you to take notes and think of questions you’d like to ask during our Q&A segment at the end.”
Personalization Opportunity
“Before we dive in, I’d like to share a bit about why I’m passionate about website building. [Insert a personal anecdote or experience that inspired you to teach this class.]
I believe that anyone can create a beautiful and functional website with the right tools and guidance. My goal today is to demystify the process and inspire you to start your own website journey.”
Transition to Next Section
“Now that we’ve covered the basics of what WordPress and Elementor are and why they’re so widely used, let’s move on to understanding the foundational elements of any website: domains and hosting. I’ll explain what these terms mean, why they’re important, and how to select reliable services to ensure your website performs well and stays secure.”
Did you know Cloudflare’s Web Application Firewall (WAF) handles 81 million HTTP requests every second at its busiest? This tool is key in shielding websites from new cyber threats1.
Web security is crucial today. Cloudflare’s WAF uses advanced threat intelligence and machine learning to block new threats, like zero-day attacks. It works with Cloudflare’s global network for top-notch protection against cyber threats2.
The Cloudflare zone-level WAF provides strong defense. It uses Managed Rules for quick action against known attacks. Plus, it has Traffic detections to add important details for better security1.
Cloudflare’s WAF also has custom rules and rate limiting for specific security needs. It’s not just about blocking threats. It’s about smart, evolving protection that keeps up with cyber threats1.
Key Takeaways:
Cloudflare WAF processes 81 million HTTP requests per second at peak
Uses threat intelligence and machine learning to stop newest threats
Offers Managed Rules for quick defense against known attacks
Employs Traffic detections to add security details to requests
Provides custom rules and rate limiting for specific security
Web security is key in today’s digital world. With web attacks on the rise, companies need strong security for their apps. Cloudflare’s Web Application Firewall (WAF) is a top choice to fight off web threats and block bad traffic.
What is a Web Application Firewall?
A WAF stands as a shield between web apps and users. It checks incoming HTTP requests to stop attacks like Cross-site Scripting (XSS), SQL injection, and Layer 7 DoS. WAFs use either a positive (allowlist) or negative (denylist) approach to block threats3.
The importance of web security
Web app attacks are the top cause of data breaches. This shows how vital WAF security is today3. Cloudflare’s WAF shields against common threats with Managed Rules, like SQL injection, XSS, and known flaws4.
Cloudflare’s role in cybersecurity
Cloudflare offers a full WAF solution that does more than just protect. It has many Managed Rulesets, lets you customize, and allows exceptions for certain IP addresses or requests4. Users can boost their site’s security by adding custom rules, blocking traffic from certain countries, and stopping spam and bots5. This makes it easy for businesses to adjust their security to fit their needs and handle malicious traffic.
How Cloudflare WAF Works
Cloudflare’s Web Application Firewall (WAF) is a key tool for stopping cyber attacks. It works on a global network to protect your website in real-time.
Real-time Threat Detection
The cloudflare zone-level web application firewall (waf) uses smart algorithms to spot and block bad traffic. It gives each request an attack score from 1 to 99. Lower scores mean a higher chance of the traffic being harmful6.
This system helps quickly find and stop threats.
Machine Learning and Threat Intelligence
Cloudflare WAF uses machine learning to get better at finding threats. It looks at web traffic patterns to spot new attacks and update its rules automatically. It can also find hidden bad content by decoding things like Base64 and JavaScript Unicode6.
Integration with Cloudflare’s Global Network
The WAF works well with Cloudflare’s big network. This means rules can be set up fast and it can handle a lot of traffic7. Companies can make their own rules based on how likely an attack is, and some plans offer even more protection6.
Cloudflare has different levels of protection for different plans. For example, Pro plans get 3 Zone Lockdown rules, while Enterprise plans get up to 2008. This means any business can get strong protection against cyber attacks.
Cloudflare uses Managed Rules and WAF attack scores for strong protection against many threats6. This way, the cloudflare zone-level web application firewall (waf) is a strong shield against cyber attacks.
Key Features of Cloudflare Zone-level Web Application Firewall (WAF)
Cloudflare’s WAF gives strong security to protect against web threats. It has three packages: Cloudflare Managed Ruleset, OWASP ModSecurity Core Rule Set, and Customer requested rules9. This mix protects against OWASP Top 10 vulnerabilities and common web threats.
The OWASP ModSecurity Core Rule Set scores requests to decide if they need WAF action. For regular requests, scores are Low (60+), Medium (40+), and High (25+). AJAX requests need higher scores9. Cloudflare suggests starting with a Low setting to avoid false alarms.
The WAF updates fast, making changes global in about 30 seconds9. This quick update keeps your web app safe from new threats. For API security, it checks JSON responses up to 128 KB for vulnerabilities9.
Cloudflare’s security team keeps updating the rules to tackle new threats and cut down on false alarms10. Users can pick rules that fit their tech, like WordPress-tagged rules for WordPress sites10. This lets you balance security without blocking good traffic.
The WAF dashboard lets you set up different actions for the Managed Ruleset10. You can choose from Managed Challenge, Block, JS Challenge, Log, and Interactive Challenge. Advanced users can use the API for more detailed control, making custom rules and overrides10.
With these strong features, Cloudflare’s Zone-level WAF offers a full solution for app security. It tackles both known and new web threats.
Protection Against OWASP Top 10 Threats
Cloudflare’s Web Application Firewall (WAF) protects against the OWASP Top 10 web threats. This tool keeps websites safe from harmful traffic and new cyber risks.
Understanding OWASP Vulnerabilities
The OWASP Top 10 lists the most serious security risks for web apps. Cloudflare’s WAF fights these threats with advanced methods. It uses a Managed Ruleset that spots common attacks and updates weekly to catch new ones11.
How Cloudflare WAF Addresses Each Threat
Cloudflare’s WAF fights web threats in several ways:
Attack scoring system: Rates incoming requests from 1 (likely malicious) to 99 (likely clean)11.
Bot detection: Figures out if requests are from bots11.
OWASP Core Ruleset: Finds common attacks like SQL injection and cross-site scripting11.
Continuous Updates for Emerging Threats
Cloudflare keeps improving its WAF for new security issues. It offers managed rulesets that guard against zero-day threats, top-10 attacks, and exposed credentials12. Users can tweak rules by making exceptions or setting overrides for flexible security12.
With Cloudflare’s WAF, websites get full protection against OWASP Top 10 and new threats. This keeps bad traffic away and ensures strong online security.
Custom Rules and Flexibility
Cloudflare’s zone-level web application firewall (WAF) is highly customizable. It lets users make specific rules to protect websites and APIs from bad traffic. This means organizations can adjust their security to fit their exact needs and policies.
The WAF blocks over 57 billion cyber threats every day, stopping about 650,000 bad HTTP requests per second13. This strong protection comes from its advanced features like checking attack scores and scanning content.
Customizing rules is key to Cloudflare’s WAF. Users can set severity levels, add or block certain IP addresses, and make unique firewall rules4. This ensures security matches an organization’s risk level and how it works.
Cloudflare has many Managed Rulesets for different security issues:
Zero-day vulnerabilities
Top-10 attack techniques
Use of stolen/exposed credentials
Extraction of sensitive data
These rulesets protect against known and new threats without needing special rules for each app4.
The WAF’s new UI makes it easier to use with features like editing many rules at once, editing one rule at a time, and a review screen for changes13. This easy-to-use interface, along with custom rules, makes Cloudflare’s WAF a must-have for web security today.
DDoS Protection and Rate Limiting
Cloudflare’s Web Application Firewall (WAF) offers strong ddos protection and helps prevent cyber attacks. It keeps websites, apps, and networks safe while making sure they work well for real users.
Mitigating Volumetric Attacks
The WAF’s rate limiting feature fights off big attacks by setting limits on how many requests come in. This tool lets website owners control who can access their site. They can check things like IP address, user agent, and where someone is from14.
Customizable Rate Limiting Rules
Cloudflare lets you set your own rules for rate limiting. You can choose what to limit based on things like what the request looks like, how often it comes in, and how many come in at once15. These rules help stop bad stuff like trying to guess passwords, taking over accounts, and scraping by bots14.
Plan
Rules Allowed
Max Mitigation Timeout
Free
Limited
10 seconds
Pro
Moderate
1 hour
Business
Advanced
24 hours
Enterprise
100+
1 day
Integration with Other Cloudflare Security Features
Rate limiting works well with other Cloudflare security tools. For example, it can guard login pages against attacks by limiting how many requests you get14. For businesses, there are even more tools to help protect you15.
Cloudflare’s WAF helps users make strong plans to stop cyber attacks. It’s great for protecting things like REST APIs, GraphQL endpoints, or SaaS apps. The flexible rules offer a strong defense against many threats14.
Advanced Security Features
Cloudflare’s Web Application Firewall (WAF) offers top-notch security to protect websites from new web threats and bad traffic. These features boost application security and fight off complex attacks.
Content Scanning for Malware Detection
Cloudflare WAF has strong content scanning to protect web servers and networks from malware. It checks files before they’re uploaded, stopping bad content and keeping user data safe. This way, websites can greatly lower the chance of malware getting in and keep their users safe1.
Exposed Credential Checks
Cloudflare WAF is great at stopping hackers from taking over accounts. It finds and blocks stolen or leaked login details, adding an extra shield against unauthorized access. This keeps user accounts safe and stops data breaches.
Zero-day Vulnerability Protection
Cloudflare WAF also fights off zero-day vulnerabilities with its managed rules and updates from threat intelligence. It uses managed rulesets, like the Cloudflare Managed Ruleset, to quickly protect against known and new threats1.
Traffic detections such as bot score and attack score
User-defined rules for customized security needs
Mitigation features like custom rules and rate limiting
Organized rule execution order for efficient request processing1
These tools work together to offer a full security solution against common web app security issues. By using Cloudflare WAF, websites can guard against attacks like Cross-site Scripting (XSS), SQL injection, and Layer 7 DoS3.
Security Feature
Function
Benefit
Content Scanning
Scans uploaded files for malware
Prevents malware infiltration
Exposed Credential Checks
Detects and blocks use of stolen credentials
Prevents account takeover attempts
Zero-day Protection
Utilizes managed rules and threat intelligence
Defends against new vulnerabilities
With these advanced security features, Cloudflare WAF gives a strong defense against web threats. It ensures better application security and keeps out malicious traffic.
Implementation and Management
Setting up Cloudflare’s web application firewall (WAF) is easy, just a few clicks. The interface makes it simple to check on requests and adjust security settings. This ease doesn’t mean the security is weak.
Cloudflare’s WAF works well with other security tools, making managing your account easy. You can add team members, check active sessions, and look at audit logs from one dashboard.
The WAF lets you manage lists in different ways. Free plans let you have 1 custom list. But, Pro, Business, and Enterprise plans let you have up to 10 custom lists with 10,000 items total16.
Enterprise customers get special access to the Open Proxies Managed IP List for better protection16. The platform also has Bot Management, scoring from 1 to 99 to see if a request is likely from a bot17.
Plan
Custom Lists
Bot Management
Free
1
Not available
Pro
10
Not available
Business
10
Not available
Enterprise
10
Available
Cloudflare’s WAF gives you detailed control over bot traffic. You can block low-scoring bot requests, challenge suspicious ones, and protect different types of traffic like APIs or mobile17. This customization ensures your app is secure in the way that suits you best.
Conclusion
Cloudflare’s Zone-level Web Application Firewall (WAF) is a strong defense against cyber attacks. It was introduced in 2021 and helps protect websites from many security threats and known vulnerabilities18. This tool is part of Cloudflare’s full security package, using a network that covers over 200 cities in more than 100 countries19.
The WAF is flexible because users can set their own rules. The number of rules changes from 5 for free plans to 1000 for enterprise plans18. This means businesses of all sizes can get top security. The WAF works well with other Cloudflare services like DDoS protection and SSL/TLS encryption, offering a strong defense against cyber threats19.
Cloudflare’s WAF does more than just protect. For paid plans, it has managed rulesets to block bad IP addresses, secure WordPress sites, and stop spam18. With Cloudflare’s global CDN, security and website speed get better, making the user experience better too19. As cyber threats keep changing, Cloudflare’s Zone-level WAF is key for keeping websites safe.
FAQ
What is a Web Application Firewall (WAF)?
A Web Application Firewall (WAF) checks incoming web and API requests. It filters out unwanted traffic using rules. It acts as a shield between the internet and your web application, protecting against various threats and attacks.
How does Cloudflare’s WAF work?
Cloudflare WAF runs on a global network, sitting in front of web applications to stop attacks in real-time. It uses powerful rules, advanced rate limiting, and checks for exposed credentials. The WAF also scans content and uses machine learning to block threats automatically.
What are the key features of Cloudflare’s WAF?
Cloudflare WAF offers custom rules for specific protection and rate limiting to control incoming requests. It includes managed rulesets for quick protection. Security Events and Security Analytics are available for business plan users to review and analyze requests.
How does Cloudflare WAF protect against OWASP Top 10 threats?
Cloudflare uses core OWASP Top 10 rules to block common layer 7 attacks. The WAF provides fast protection against new threats with managed rules. Custom rules allow specific policies. Cloudflare keeps updating its protection to tackle new threats and vulnerabilities.
Can I create custom rules with Cloudflare WAF?
Yes, Cloudflare WAF lets users create custom rules to block malicious traffic. These rules can include advanced features like WAF attack score and content scanning. This flexibility helps organizations tailor their WAF to their security needs.
Does Cloudflare WAF offer DDoS protection and rate limiting?
Yes, Cloudflare provides strong DDoS protection to secure websites and networks. The WAF has customizable rate limiting rules to set request thresholds. It also defines actions when limits are hit.
What advanced security features does Cloudflare WAF offer?
Cloudflare WAF scans content to protect servers and networks from malware. It prevents account takeovers by blocking stolen login credentials. The WAF offers zero-day protection with managed rules and updates based on threat intelligence.
How easy is it to implement and manage Cloudflare WAF?
Cloudflare WAF is easy to set up with just a few clicks, no training needed. It has an easy interface for reviewing requests and customizing security. The WAF works with other Cloudflare security features for full account security.
Did you know every single review of Termageddon is a glowing 5-star rating? This fact shows how well this privacy policy generator is doing. It’s a big deal for businesses dealing with data privacy laws. Tools like Termageddon help keep things legal and build trust with customers.
Nowadays, having website policies is a must for all businesses. Termageddon is a powerful tool that makes handling legal policies and data privacy easier. It was created by a licensed attorney and a Certified Information Privacy Professional. Their goal is to make it simple for websites and apps to have up-to-date privacy policies.
Termageddon keeps up with many privacy laws, like GDPR, CCPA, and PIPEDA. It’s also ready for new laws, such as the Iowa SF262 and the Texas Data Privacy and Security Act. Its easy-to-use interface and automatic updates are changing how businesses handle website policies and legal stuff.
Key Takeaways
Termageddon offers automatic policy updates for changing privacy laws
The service covers multiple existing and upcoming privacy regulations
Pricing starts at $12 per month or $119 per year for a single website
Founded by a licensed attorney specializing in privacy law
Suitable for various types of websites collecting personal information
Simplifies policy creation through a customized questionnaire process
Introduction to Privacy Policy Generators
Privacy policies are now key in our digital world. With laws like GDPR and CCPA, companies must protect user data. This has led to a need for tools that make creating policies easier.
The importance of privacy policies in the digital age
Privacy policies are legal agreements between companies and users. They explain how personal information is used and kept safe. Not following these rules can lead to big fines or legal trouble.
These laws don’t care where a business is located. They focus on protecting people in certain areas.
Why businesses need automated policy generation tools
Writing privacy policies by hand is hard. Many companies use templates, but they might not cover everything needed for GDPR. Automated tools can make policies that fit specific laws and business needs.
Overview of Termageddon’s role in the market
Termageddon is a solution for accurate, current privacy policies. It makes policies that follow laws like GDPR and CalOPPA. By automating updates, Termageddon helps businesses avoid fines and stay legal.
Privacy Law
Key Requirements
GDPR (EU)
Protects EU residents’ data, applies globally
CalOPPA (California)
Applies to websites collecting PII from California consumers
CCPA (California)
Applies to large businesses or those handling significant California resident data
What is Termageddon?
Termageddon is a top online tool that started in 2017, right before the GDPR was put into action. It has become a key resource for making websites follow the law, creating thousands of legal policies for businesses all over the world.
Company Background and Mission
Donata Stroink-Skillrud, a licensed lawyer and Certified Information Privacy Professional, started Termageddon. The goal is to make following the law easier for websites. Termageddon aims to give businesses of any size affordable, current legal policies.
Key Features of Termageddon’s Service
Termageddon has some standout features:
Automatic policy updates to reflect changing laws
Coverage for multiple privacy regulations, including GDPR, CCPA, and COPPA
User-friendly interface for easy policy creation
Customizable policies tailored to individual business needs
Target Audience for Termageddon
Termageddon is for a wide range of people, including:
With its wide coverage and automatic updates, Termageddon makes it easy for businesses to stay in line with the law.
Termageddon Review: Pricing and Plans
Termageddon has a simple pricing plan for its legal solutions for websites. It offers a single license for $10 a month or $99 a year. This makes Termageddon a great choice for businesses looking for affordable legal protection.
With a Termageddon license, you get important documents like a Privacy Policy, Terms of Service, Disclaimer, Cookie Policy, and End User License Agreement. These cover one website or app, helping you stay legally compliant. You also get a cookie consent banner that supports up to 50,000 user sessions each month.
Feature
Details
Monthly Price
$12
Annual Price
$119
Included Policies
Privacy Policy, Terms of Service, Disclaimer, Cookie Policy, EULA
Cookie Consent Banner
Up to 50,000 user sessions/month
Policy Updates
Automatic
Policy Edits
Unlimited
Branding
No Termageddon branding on policies
Users love Termageddon, giving it a perfect 5.0 out of 5 rating. They praise its ease of use, features, design, and support. This shows Termageddon’s dedication to offering top-notch legal solutions for websites at a fair price.
Comprehensive Policy Coverage
Termageddon provides a wide range of essential policies for websites and businesses. They cover everything from privacy policy to terms of service and cookie policy.
Types of Policies Offered
Termageddon’s policy generator creates several key documents:
Privacy Policy
Terms of Service
Cookie Policy
Disclaimer
End User License Agreement
These policies help businesses meet legal requirements and protect their interests. For online stores, Termageddon also offers policies on cancellations, shipping, refunds, and returns.
Supported Privacy Laws
Termageddon keeps up with various privacy laws, including:
GDPR (General Data Protection Regulation)
CCPA/CPRA (California Consumer Privacy Act)
PIPEDA (Personal Information Protection and Electronic Documents Act)
State-specific privacy laws
This broad coverage helps businesses stay compliant across different places. It’s important, as privacy fines can be as high as $7,500 per infringement.
Automatic Policy Updates
Termageddon’s automatic policy updates are a key feature. They update your policies as privacy laws change. This keeps you in compliance without the hassle.
For $12 a month or $119 a year, Termageddon offers a single website license with these features. It’s a small price for peace of mind in the complex world of online privacy and legal compliance.
User Experience and Interface
Termageddon stands out for its user-friendly design. It makes creating website and legal policies easy. The design is simple, making it easy for users to go through the policy creation process. After signing up, users get guided by a series of questions that match their needs.
The questionnaire format of Termageddon helps create policies that fit the user’s business perfectly. This ensures each policy is made just for the user’s needs. The layout is intuitive, making it easy to add in necessary information. This cuts down the time and effort usually needed to make policies.
Termageddon also has great features for managing policies. Users get alerts when updates are needed because of law changes. This keeps policies up-to-date and compliant. The platform offers various ways to embed policies on websites.
While Termageddon is great in many ways, some might find starting it a bit slow. But, the payoff is a detailed policy that truly reflects their business and legal duties. Overall, Termageddon’s easy-to-use interface and smart design make it a top choice for compliance tools.
Policy Generation Process
Termageddon’s online policy generator makes creating custom legal policies easy for website owners. It’s designed to be simple and tailored to your business needs.
Creating Your Policy
To start, users answer questions about their business. This makes sure the policy covers everything it needs to. It includes all the right disclosures for laws like GDPR, CCPA/CPRA, and PIPEDA.
Customization Options
Termageddon lets you customize your policy a lot. You can add details for things like Google Analytics, email marketing, or ads. The Premium Plan even lets you customize privacy policies, terms, and return policies more.
Website Integration
After making your policy, it’s easy to put it on your website. Termageddon gives you embed codes for a smooth fit. WordPress users get a special plugin for easy setup. The tool also has a cookie consent banner to help with website rules.
Feature
Details
Policy Types
Privacy Policy, Terms of Service, Disclaimer, Cookie Policy, EULA
Customization
Provisions for analytics, ads, user accounts, refunds, and more
Termageddon is a leader in data privacy and legal agreements. It was started by Donata and Hans in 2017. Donata, a co-founder, leads the American Bar Association’s ePrivacy Committee. This shows the company’s dedication to being at the forefront of the field.
This platform is a pro at following GDPR rules and knows a lot about privacy laws. It makes policies for many laws, like GDPR, UK DPA, and CCPA/CPRA. This means businesses can follow the law in many places.
Termageddon is all about being proactive with data privacy. They made their tool before GDPR was even a thing. This shows they’re ahead of the curve in privacy laws. The International Association of Privacy Professionals has taken notice, making Termageddon the only tool they recommend.
People love how easy Termageddon is to set up and use. It updates automatically to keep up with new laws, which is key for staying legal. With thousands of happy customers worldwide, Termageddon has shown it’s a valuable tool for many types of businesses.
At $12 a month or $119 a year, Termageddon is a budget-friendly option for businesses. It combines deep legal knowledge, wide coverage, and easy-to-use features. This makes it a top choice in the privacy policy generator market.
Comparison with Other Policy Generators
When picking a privacy policy generator, it’s key to look at different options. Let’s see how Termageddon compares with other legal solutions for websites.
Termageddon vs. PrivacyPolicies.com
Termageddon has clearer pricing and automatic updates over PrivacyPolicies.com. This means you stay up-to-date with privacy laws easily, without extra work.
Termageddon vs. FreePrivacyPolicy
FreePrivacyPolicy gives basic templates, but Termageddon covers more privacy laws. This is important since about 30 privacy bills are being tracked at any time.
Unique Selling Points of Termageddon
Termageddon is unique for its custom approach to making policies. It includes things like cookie consent banners and geolocation detection, which others don’t have.
Feature
Termageddon
PrivacyPolicies.com
FreePrivacyPolicy
Automatic Updates
Yes
No
No
Cookie Consent Banners
Yes
Limited
No
Geolocation Detection
Yes
No
No
Comprehensive Law Coverage
High
Medium
Low
In 2023, six new privacy laws were added, and three more are set for 2024. Choosing a strong privacy policy generator is key to staying compliant and protecting customer data.
Customer Support and Resources
Termageddon excels in customer support, offering various ways to help with website compliance and legal policies. They have a 5.0 out of 5 customer service rating from 15 reviews. This shows their commitment to making users happy.
Users can get help by phone, email, or through a special support portal. This means help is always easy to find, no matter how you like to communicate.
Termageddon also provides detailed guides and resources. These help users understand and use their policies right, ensuring their websites are compliant.
State privacy bill tracker
Implementation guides
Policy customization tutorials
The state privacy bill tracker is a key feature. It keeps users updated on legal changes, helping them stay on top of legal matters.
With a score of 4.9 out of 5 for ease of use, Termageddon shows that handling legal policies doesn’t have to be hard. Their easy-to-use interface and strong support make dealing with online compliance simple.
“Termageddon’s customer support is unmatched. They’re always ready to assist, making legal compliance easy.”
In today’s world, website compliance is key. Termageddon’s focus on customer support and resources makes it a leading choice for businesses of all sizes.
Pros and Cons of Using Termageddon
Choosing a policy generator like Termageddon for your website legal needs is a big decision. This review looks at the good and bad points to help you decide.
Advantages of choosing Termageddon
Termageddon has many benefits as a policy generator:
Automatic policy updates to keep your website legal
Comprehensive coverage of various privacy laws
Backed by legal experts for reliable policy creation
User-friendly interface for easy policy generation
Affordable monthly pricing starting at $10 per license
Potential drawbacks to consider
Termageddon has its strengths, but there are some things to think about:
Recurring cost compared to one-time fee generators
Limited language support (currently only in English)
Lack of integrations with other platforms
Need for ongoing subscription for policy updates
Feature
Termageddon
Other Policy Generators
Pricing Model
Monthly/Annual Subscription
One-time Fee or Free
Automatic Updates
Yes
Varies
Language Support
English Only
Often Multiple Languages
Legal Expertise
Strong
Varies
The choice to use Termageddon depends on your specific needs and budget for website legal solutions.
Conclusion
Termageddon is a leading tool for creating privacy policies that keep up with website laws. With new privacy laws popping up in places like Hawaii, Illinois, and New York, having a strong privacy policy is key. Termageddon makes sure your website follows these laws by automatically updating its policies.
This tool is easy to use and covers all you need for a privacy policy. Adding it to your website is easy, even for basic HTML/PHP sites. For those using advanced tech like ReactJS or GatsbyJS, there might be a bit more work. But, the benefits of using Termageddon are well worth it.
With recent privacy issues, like the U.S. Marshals Service’s ransomware attack and the EU’s worries about the EU-US Data Privacy Framework, Termageddon is more important than ever. It helps businesses keep up with data protection laws. This tool makes it easy to keep your privacy policies current, helping you meet legal requirements and gain your users’ trust.
FAQ
What is Termageddon?
Termageddon is a tool that helps businesses make legal policies for their websites. It keeps policies up to date with law changes. It covers many privacy laws, including GDPR and CCPA, and is easy to use.
Why are privacy policies important for businesses?
Privacy policies are key because of tough data protection laws like GDPR and CCPA. Businesses need tools to follow these laws and avoid fines. Termageddon helps by giving updated policies that follow privacy laws, saving time and ensuring compliance.
What is the pricing of Termageddon?
Termageddon costs a month or 9 a year. It includes policies like Privacy Policy, Terms of Service, and Cookie Policy for one site or app. You also get a cookie consent banner for up to 50,000 users, automatic updates, and unlimited policy changes without Termageddon branding.
What types of policies does Termageddon offer?
Termageddon has many policies like Privacy Policy, Cookie Policy, and Disclaimer. It also includes End User License Agreement and Terms of Service. These cover laws like GDPR, CCPA/CPRA, PIPEDA, and state privacy laws.
How does the policy generation process work?
Termageddon makes creating policies easy. First, you create an account and buy a license. Then, you answer a questionnaire to get the right disclosures. You can embed the policies on your site with code, and there’s WordPress integration too.
Who is behind Termageddon?
Donata Stroink-Skillrud, a lawyer and Certified Information Privacy Professional, started Termageddon. She knows a lot about privacy law. The service makes sure you follow privacy laws and keeps up with new state bills.
How does Termageddon compare to other policy generators?
Termageddon is better than PrivacyPolicies.com and FreePrivacyPolicy in many ways. It has clear pricing, automatic updates, and covers more privacy laws. It offers a custom approach to making policies and includes features like cookie consent banners and geolocation detection.
What kind of customer support does Termageddon provide?
Termageddon has support by phone, email, and a support portal. It gives detailed guides and resources to help you use your policies right. The service also tracks state privacy bills to keep you updated on legal changes.
Navigating the intricacies of the online legal domain can seem daunting, but there’s good news! You can now purchase Termagedon directly from Popproxx, ensuring your website is compliant and cutting-edge. But that’s not all—Popproxx goes a step further. Recognizing that implementation can sometimes be challenging, we proudly offer an installation and configuration service tailored to your needs. Equipping your website with the best online policy management has never been easier. Dive into the future of online compliance with Popproxx and Termagedon by your side!
Termageddon is a provider of auto-updating website policies. Get help complying with GDPR, CCPA and more.
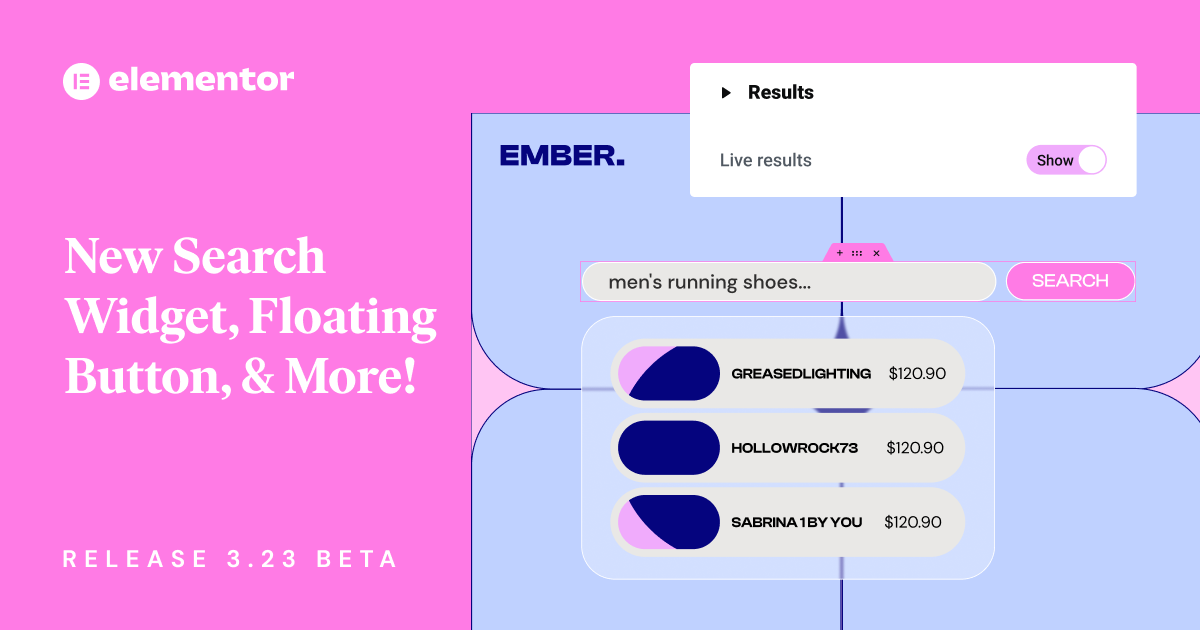
Elementor 3.23 has arrived, bringing new features to the popular website builder. This update focuses on making things faster and easier for users. It sets a new standard for web design tools.
The latest version has an enhanced Search widget with live results. This makes finding things on websites faster and more fun. A new Floating Button widget helps increase sales, and Link in Bio widgets make adding social media links easy.
These new features come with big performance upgrades. This makes Elementor 3.23 a big deal for web designers and site owners.
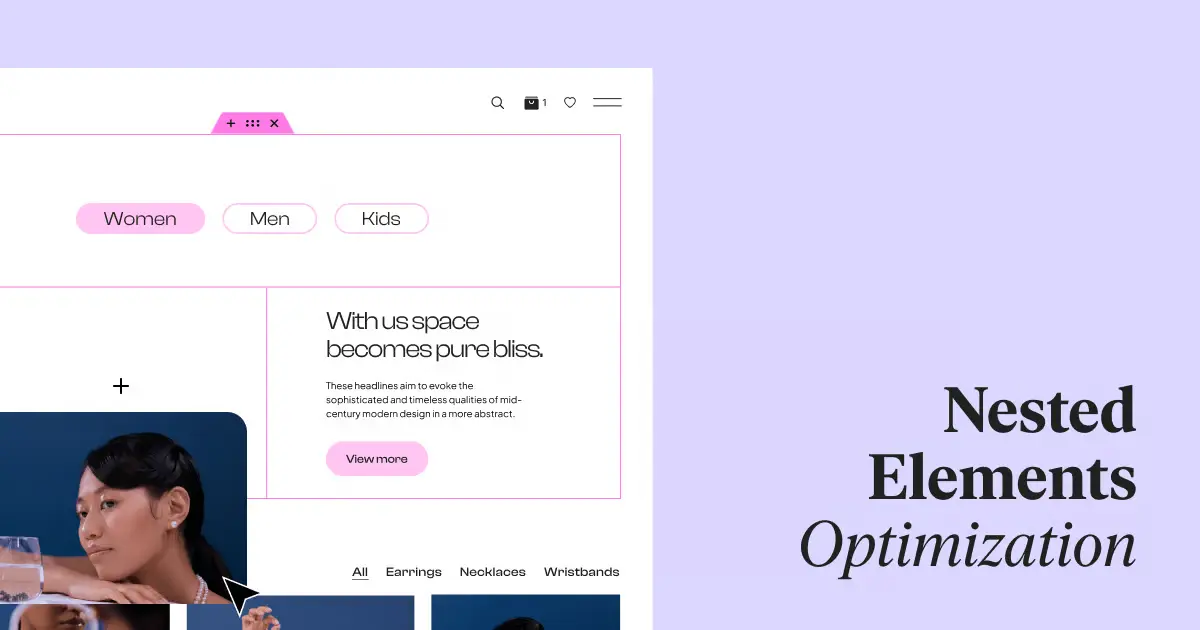
One big improvement is Nested Elements, which make designing faster and more detailed. Editor performance has gotten 60%-98% better. Element Caching is now on by default for new sites, making websites load faster.
Key Takeaways
New Search Widget with AJAX-powered live results
40+ Floating Button templates available in Elementor Pro
Seven new Link in Bio widgets for social media integration
Significant editor performance gains with optimized Nested Elements
Element Caching active by default for new sites
Improved accessibility features, including screen reader compatibility
Introduction to Elementor 3.23
Elementor 3.23 is a big step forward in making websites better and more engaging. It comes with new tools to make exploring sites easier, design more precise, and keep visitors interested. The beta version is out for testing, letting users share their thoughts on the new stuff.
The new Search Widget is a big deal in this update. It shows live search results as people type, changing how we look at site content. You can set the search to look in “All”, “Product”, or “Posts”, making searching more personal.
Improving site speed is a key focus of Elementor 3.23. The time it takes for nested widgets to work has gotten much faster:
Metric
Before
After
Improvement
Interaction Time (Case 1)
2,290ms
240ms
89.5%
Interaction Time (Case 2)
707ms
5.5ms
99.2%
Elementor 3.23 also introduces Floating Buttons to help increase conversions. These buttons make it easy for visitors to connect with you. They come in many templates and can show your contact info.
To try out these new features, go to WordPress Dashboard → Elementor → Features. This update shows Elementor’s ongoing effort to make websites better and faster.
Enhanced Search Widget: Revolutionizing User Experience
Elementor 3.23 introduces a game-changing search widget that changes how users interact with websites. This feature brings AJAX search to the forefront, making site navigation and user engagement better.
AJAX-powered Live Results
The new search widget uses AJAX technology for instant results as users type. This makes searching faster and more efficient, helping visitors find what they need quickly.
Customizable Search Input and Results Display
With this customizable search widget, website owners can make the search fit their brand. They can change the search input field, submit buttons, and how live results are shown.
Dynamic Filtering Options
The search widget also has powerful filtering options. Users can narrow down their search results on the fly. This makes searching more targeted and relevant, boosting user satisfaction.
Feature
Description
Benefit
AJAX Search
Real-time results as users type
Faster content discovery
Live Results
Instant display of search matches
Improved user engagement
Customizable Widget
Tailored search input and results display
Consistent brand experience
Dynamic Filtering
Refined search options
More relevant search results
The enhanced search widget in Elementor 3.23 is a big step forward for websites. It combines AJAX search, live results, and customization. This makes it a powerful tool for better user experience and finding content.
Floating Button Widget: Boosting Conversions
Elementor’s new Floating Button Widget is changing the game for boosting conversions. It has sticky buttons that stay visible as users scroll. This means users always have easy access to important actions. The widget comes with many customizable templates, including three for free and over 40 in Elementor Pro.
Users can make each template their own, picking messaging platforms and customizing avatars and chat messages. This makes it easy to add chat features, which can improve user engagement and increase conversions.
Feature
Free Version
Elementor Pro
Pre-designed Templates
3
40+
Customization Options
Limited
Extensive
Click Tracking
Yes
Yes
Display Conditions
Basic
Advanced
The Floating Button Widget tracks clicks, helping businesses see how well it works. It also lets you target messages to certain groups of people. This personal touch can really help increase conversions, as studies show it can boost them by up to 35%.
“The Floating Button Widget is a powerful tool for businesses looking to enhance user engagement and drive conversions. Its customization options and strategic placement make it an invaluable asset for any website.”
Link in Bio Widgets: Streamlining Social Media Integration
Elementor 3.23 has introduced a big change for social media: Link in Bio widgets. These widgets help make pages that bring together content and calls-to-action from different social platforms. They are customizable and responsive.
Seven Ready-to-Use Widgets
There are now seven new Link in Bio widgets. They help improve brand identity and make social media easier to manage. Users can pick from over 60 pre-made blocks in the library for quick page setup.
Customization Options for Brand Identity
These widgets let users customize their Link in Bio pages to match their brand. You can change colors and fonts to show off your brand’s unique style.
Widget Feature
Benefit
Responsive Design
Ensures optimal display across all devices
Customizable Layouts
Allows for unique brand representation
Multiple Platform Support
Integrates seamlessly with various social media platforms
Availability for Free and Pro Users
Elementor’s update is for both free and pro users. Free users get the “Minimalist” widget for simple social media integration. Pro users get all seven widgets for more design options and flexibility.
With these new Link in Bio widgets, Elementor is making it easier for users to have a strong online presence on different social media platforms.
Performance Improvements for Nested Elements
Elementor 3.23 has changed the game with its boost to website performance. It has made the editor faster by cutting down the time it takes to interact with it by 60% to 98%. This is thanks to the upgrade of Nested Elements, a feature from version 3.10.
Now, creating complex designs is faster thanks to the widget’s new infrastructure. Designers can easily make detailed layouts using Flexbox Containers. This makes editing smoother, letting users work better.
Here are some key ways it’s improved:
Element Caching feature improves Time To First Byte (TTFB) by 30%-70%
Memory usage decreases from 3MB to 8KB with Elementor caching
Waypoint.js library replacement reduces memory use by 18KB
These changes make designing easier and help websites run better. Sites load faster and use less memory, which means a better experience for visitors.
Feature
Improvement
Editor Interaction Time
60%-98% reduction
TTFB
30%-70% improvement
Memory Usage
Reduced from 3MB to 8KB
With these updates, Elementor 3.23 helps designers make complex layouts efficiently. It also ensures websites run smoothly.
New in Elementor 3.23: Element Caching and Top Bar
Elementor 3.23 introduces big changes to make websites load faster and easier to edit. Element Caching is now on by default for new sites, making them run smoother and quicker. This is a big win for speeding up websites.
The Top Bar is now a key part of the Editor, changing how we work. It makes editing better by showing responsive previews, giving quick access to the Theme Builder, and making it easy to move between pages. These updates make editing smoother and easier.
Feature
Benefit
Element Caching
Faster loading times, improved performance
Top Bar Integration
Enhanced editor navigation, streamlined workflow
Responsive Preview
Instant view of different device layouts
Theme Builder Access
Quick modifications to site-wide elements
With these updates, Elementor keeps focusing on making things better for users and websites. The mix of Element Caching and the Top Bar lets users make websites that load fast and are easy to edit.
Accessibility Enhancements: Improved DOM Output
Elementor 3.23 makes a big step forward in web accessibility with its new DOM output. This update aims to make websites more inclusive, especially for users who use screen readers.
Screen Reader Compatibility for Mega Menu
The Mega Menu now works perfectly with screen readers. This means visually impaired users can easily go through complex menus. The better keyboard navigation also supports inclusive design, making sites more accessible to everyone.
Impact on Overall Website Accessibility
These updates make the web more inclusive. By making the DOM output better, Elementor 3.23 cuts down on code, making sites load faster. This is great for users with slow internet or old devices.
39% less code for Flexbox Containers
85% less code for Grid Containers
Improved Time to First Byte (TTFB) score by 3-5%
With these updates, Elementor keeps focusing on making sites accessible to everyone. Now, developers can make sites that look good and work well for all users, no matter their abilities or tools.
Elementor’s Growth and Market Presence
Elementor keeps adding new features, showing it’s a big player in the website builder market. It’s always innovating, keeping up with the latest web design trends.
The Search Widget with Live Results in version 3.23.0 is a great example. It uses AJAX technology for real-time search results. This meets the high standards of today’s web design.
Elementor also introduced the Off-Canvas widget in version 3.22.0. This feature lets designers add engaging layers to their sites. Layers are a big trend in web design right now.
Version
Feature
Impact on Web Design
3.23.0
Search Widget with Live Results
Improved user engagement
3.22.0
Off-Canvas Widget
Enhanced layered design capabilities
3.21.0
Loop Taxonomy Query
Advanced content organization
3.19.0
Display Conditions
Personalized content delivery
These updates show how Elementor is making a mark in web design. It gives designers tools that follow the Golden Ratio. This helps create sites that look good and are easy to use. It could lead to more people using Elementor in the website builder market.
Upcoming Features in Elementor’s Roadmap
Elementor’s future updates are bringing exciting changes to web design. With over 16 million websites using it, the platform keeps getting better. Let’s look at some new features coming our way.
AI Integration Advancements
AI is changing web design. Elementor might add AI tools to help with design, layout, and even content creation. This could make designing websites faster and more engaging.
Dynamic Content Enhancements
Elementor already has dynamic content, but it’s getting even better. We might see more ways to personalize websites. This could mean websites change based on what users like or do.
Website Setup Acceleration
Elementor’s template library might grow even more. New tools could make starting a website quicker. Maybe with AI help or templates for specific industries.
Details are still secret, but these ideas show Elementor’s drive for innovation. As it grows, users will get more tools to make amazing, dynamic websites easily.
Elementor Hosting: Performance and Security Updates
Elementor Hosting is changing the game with its managed WordPress hosting. It focuses on making websites secure and fast. It uses Google Cloud for top security like SSL certificates, daily backups, and protection against DDoS attacks.
Building websites is quick and easy, taking just 5 minutes. There are over 120 widgets and 150 templates to choose from. This makes it simple for anyone to create a website.
The Staging Tool is a big plus. It lets users test new features safely. This way, updates can be made without affecting the live site. Everything you need is in one dashboard, so you don’t need to know a lot about tech.
Worry-free managed hosting with optimized environments
Enhanced security measures for safe websites
Integrated AI tool for content creation and automation
Seamless domain purchase and custom email setup
Elementor Hosting meets all kinds of needs, from simple sites to complex e-commerce stores. It works well with WooCommerce for better online stores. Features like Lazy Loading and Image Optimizer make websites run smoothly.
With over 16 million websites using Elementor, its hosting keeps getting better. It’s setting new standards in managed WordPress hosting.
Send: New WooCommerce Marketing Tool
WooCommerce marketing has just gotten a big boost with Send, a new e-commerce tool. This tool aims to change how online store owners talk to their customers and boost sales.
Early Access Program Details
Send is now available through an early access program for WooCommerce store owners. By signing up, you can be one of the first to try this advanced email marketing platform. This program lets you help shape the tool and get ahead in the e-commerce world.
Integration with Existing WooCommerce Stores
Send works smoothly with your current WooCommerce store. This means you can easily share customer info, product details, and purchase history. You can use this info to make email marketing campaigns that really speak to your customers.
Send has some key features:
Automated email sequences based on customer behavior
Customizable email templates optimized for conversions
Advanced segmentation capabilities for personalized messaging
Detailed analytics to track campaign performance and ROI
By using WooCommerce and Send together, store owners can make their marketing more effective. They can build stronger customer relationships and increase sales. As online shopping changes, tools like Send are key to staying ahead.
Conclusion
Elementor 3.23 brings big updates that change web design for the better. It now has a search widget with live results and options to customize how it looks. This makes websites more user-friendly.
There are also new tools like the floating button widget and link in bio features. These help turn visitors into customers and connect with social media easily.
Elementor has made its elements faster and more efficient. It also works better with screen readers for people who need accessibility tools. This shows Elementor’s focus on making websites for everyone.
Looking forward, Elementor is planning to add AI and dynamic content features. These updates will make websites faster and safer. The new tool for WooCommerce, Send, will help online stores grow even more.
FAQ
What are the key new features introduced in Elementor 3.23?
Elementor 3.23 brings many new features. These include an enhanced Search widget with live results and a Floating Button widget for more conversions. It also has Link in Bio widgets for social media, performance boosts for Nested Elements, Element Caching, a Top Bar, and better accessibility.
How does the new Search Widget in Elementor 3.23 improve the user experience?
The new Search Widget shows live results as you type, thanks to AJAX. You can customize the search input, buttons, and how results are displayed. This makes searching more personalized.
What is the purpose of the Floating Button widget in Elementor 3.23?
The Floating Button widget aims to boost conversions by linking directly to chats or other platforms. It comes with customizable templates, messaging platform integration, and options for targeting your audience.
How do the Link in Bio widgets in Elementor 3.23 benefit social media integration?
Elementor 3.23 offers seven Link in Bio widgets for creating responsive pages. These pages have consolidated content and CTAs for social media. They let you customize for your brand and use over 60 pre-designed blocks.
What performance improvements are included in Elementor 3.23 for Nested Elements?
Elementor 3.23 has big performance boosts for Nested Elements. This reduces Editor interaction time by 60%-98%. It makes creating complex designs faster and editing smoother.
What is Element Caching, and how does it impact website performance?
Element Caching is now on by default for new sites in Elementor 3.23. It greatly improves performance and cuts loading times for websites made with Elementor.
How does the new Top Bar in Elementor 3.23 enhance the user experience?
The Top Bar is now a key part of the Editor in Elementor 3.23. It makes navigating and working more efficient. You can preview responsive views, access the Theme Builder, and switch between pages easily.
What accessibility improvements are included in Elementor 3.23?
Elementor 3.23 has made accessibility better with restructured DOM output. This makes Mega Menu content work well with screen readers. These updates help make websites more inclusive and accessible to everyone.
In 2018, GitHub faced a massive DDoS attack with 1.3 terabytes of traffic hitting their servers every second. This shows how big the threat of denial of service attacks has become. With WordPress running over 43% of all websites, it’s key to know how these threats can hurt your online presence.
DDoS attacks try to overwhelm online services with lots of fake traffic. These attacks can cause big problems like downtime, money loss, and harm to your reputation. Since WordPress sites are often targeted, it’s vital to understand and fight against these attacks.
Key Takeaways
DDoS attacks on WordPress sites are on the rise, causing downtime and financial losses
Various types of DDoS attacks exist, each targeting different vulnerabilities
Proper hosting, security tools, and monitoring are essential for protection
Botnets play a key role in executing high-volume DDoS attacks
Implementing a Web Application Firewall (WAF) and Content Delivery Network (CDN) can enhance security
Recognizing attack signs early is crucial for swift mitigation
What is a DDoS Attack?
A DDoS attack is a major cyber threat that can make websites and online services unavailable. It’s becoming more common, hitting big names like Amazon and Google.
Definition and Basic Concepts
A DDoS attack happens when many hacked devices send a lot of traffic to a target, overwhelming it. This makes it hard for real users to get through. In 2020, Amazon Web Services faced the biggest DDoS attack ever, showing how big this threat has become.
How DDoS Attacks Work
DDoS attacks often use botnets to carry out their plans. Criminals make botnets by infecting devices with malware, often through fake downloads or weak passwords. It’s thought that about 12.5 million devices could be turned into botnets.
Common Motivations Behind DDoS Attacks
DDoS attacks have different reasons. Some are done for fun, others for political reasons. Companies might face these attacks from rivals wanting to disrupt their work. In some cases, attackers ask for money to stop the attack. These attacks can last from a few hours to many months, really messing with online services.
Attack Type
Target
Impact
Volume-based
Bandwidth
Network congestion
Protocol
Network stack
Service disruption
Application-layer
Server resources
Website unavailability
Types of DDoS Attacks
DDoS attacks target different parts of a network or system. It’s key to know these types for good protection.
Volumetric attacks are the most common. They try to use up a network’s bandwidth. These attacks started in the late 1990s and are measured in bits or Gigabits per second. UDP floods, CharGEN floods, and ICMP floods are examples.
Application layer attacks hit web servers hard, using up CPU and memory. These attacks are counted in Requests per second (Rps). They take advantage of weaknesses in web apps. HTTP POST floods and HTTPS POST floods are types of these attacks.
Protocol attacks work at layers 3 and 4 of the OSI model. They’re counted in packets per second (pps). UDP floods and TCP SYN floods are common. These attacks use network protocols to drain server resources.
Nowadays, attacks are getting shorter but pack more packets per second. These attacks can come from many reasons, like ideology or business disputes. This makes them a big threat in many areas.
Attack Type
Measurement
Examples
Volumetric
bps/Gbps
UDP Flood, ICMP Flood
Application Layer
Rps
HTTP POST Flood, HTTPS POST Flood
Protocol
pps
SYN Flood, ACK Flood
Knowing about these attack types helps website owners get ready for DDoS threats.
The Impact of DDoS Attacks on WordPress Websites
DDoS attacks are a big threat to WordPress websites, which run over 43.1% of all websites online. These attacks can seriously harm network security and affect businesses a lot.
Immediate consequences
When a DDoS attack happens, the problems start fast. Websites become slow, crash often, and show server errors like ‘503 Service Unavailable’. For example, one site faced 2.5 million attacks in an hour, causing 17 minutes of downtime even with Cloudflare’s free version.
Long-term effects on business
DDoS attacks have big long-term effects. Businesses lose money, their reputation gets hurt, and security risks go up. Customers lose trust, leading to financial problems and trouble keeping the business going. The brand’s image can be damaged, hurting its market position for a long time.
SEO implications
DDoS attacks can really hurt a website’s search engine rankings. Downtime and poor performance during attacks tell search engines the site is unreliable. This can lead to lower rankings, less organic traffic, and less visibility online. Getting back on track often takes a lot of time and work.
Impact Area
Short-term Effects
Long-term Consequences
Website Performance
Slow loading, crashes
Reduced user trust, traffic loss
Business Operations
Revenue loss, customer frustration
Reputation damage, legal issues
SEO
Temporary ranking drops
Long-term visibility decrease
Recognizing a DDoS Attack in Progress
Spotting a denial of service attack fast is key to keeping your WordPress site safe. Experts say 73% of companies have faced these attacks, with 85% hit by more than one. Catching it early can prevent big losses, as 49% of companies lose over $100,000 an hour during these attacks.
Look out for these signs of a DDoS attack:
Sudden traffic spikes from unusual sources
Slow-loading or inaccessible web pages
Increased error rates (HTTP 503 or 504 codes)
High server resource utilization (CPU or memory)
Unexpected bot traffic
To catch an attack early, try these tips:
Use traffic monitoring tools to spot odd patterns
Have clear steps for your team to follow when alerts pop up
Work with your ISP to tackle and stop attacks
Install DDoS detection and mitigation tools
Look at past data to see where attacks might come from
Quick action is crucial. Spotting a DDoS attack fast helps reduce its effects and keeps your WordPress site safe from big losses and data breaches.
DDoS Attacks: A Growing Threat to WordPress Sites
WordPress sites are facing more cyber threats as DDoS attacks grow in number and complexity. Since WordPress is so popular, it’s a top target for hackers who want to disrupt websites.
WordPress as a Prime Target
WordPress runs over 40% of all websites, making it a big target for cybercriminals. Many users don’t take the right steps to secure their sites, making them easy targets.
Recent DDoS Attack Trends
Cloudflare saw a 117% jump in network-layer DDoS attacks from last year. Retail, shipment, and public relations sites were hit hard, especially during busy times like Black Friday. In the first half of 2023, attacks rose by 31%, with 7.9 million DDoS attacks recorded.
Evolving Attack Sophistication
DDoS attacks are getting more complex and tough to stop. Kinsta, a managed WordPress hosting service, faced a huge attack in March with 318,930 requests per second. To fight these threats, hosting services are using better protection:
Dedicated DDoS protection layers
Web Application Firewalls (WAF)
Anycast routing and load balancers
Content Delivery Networks (CDNs)
As cyber threats get worse, WordPress site owners need to be alert and use strong security to keep their sites safe.
Essential WordPress DDoS Protection Measures
Protecting your WordPress site from DDoS attacks means using a strong defense plan. It’s key to have good ddos protection strategies to keep your site safe and stable.
First, make sure your hosting is secure. Pick a reliable provider that has DDoS protection built-in. This is a must for fighting off different kinds of attacks, like big traffic floods, protocol attacks, and application attacks.
Next, add a Web Application Firewall (WAF) to block bad traffic. WAFs are great against attacks that target your WordPress site’s code, plugins, or themes.
Then, use a Content Delivery Network (CDN) to spread your site’s traffic over many servers. This helps lessen the blow of DDoS attacks and makes your site run smoother.
Disable XML-RPC and REST API if not needed
Use strong passwords and two-factor authentication
Keep all WordPress components updated
Conduct regular security audits
Watch your site’s stats for any signs of an attack. If you see sudden spikes in traffic or strange patterns, it might be a DDoS attack. Having a plan for disaster recovery is key to acting fast.
Protection Measure
Purpose
Effectiveness
Web Application Firewall
Filter malicious traffic
High
Content Delivery Network
Distribute traffic load
Medium
Strong Authentication
Prevent unauthorized access
Medium
Regular Updates
Close security vulnerabilities
High
By using these ddos protection strategies, your WordPress site will be much stronger against attacks. Remember, fighting off ddos threats is an ongoing task. You need to stay alert and keep updating your security steps.
Advanced Techniques for Enhanced WordPress DDoS Protection
Protecting your WordPress site from DDoS attacks needs advanced strategies. These methods go beyond basic security to offer strong defense against complex threats.
Implementing a Web Application Firewall (WAF)
A WAF acts as a shield for your WordPress site. It checks incoming traffic and stops suspicious requests. This is key for fighting off ddos attacks aimed at the application layer. Many WAFs can be tailored to meet your site’s unique needs.
Utilizing Content Delivery Networks (CDNs)
CDNs are crucial for DDoS protection. They spread your site’s content over many servers worldwide. This setup helps soak up traffic surges during an attack. Cloudflare, a well-known CDN, has built-in DDoS protection features.
Traffic Monitoring and Analysis
It’s important to watch your traffic closely. Advanced tools can spot unusual spikes or patterns that might signal an attack. This early alert lets you act fast against threats.
Implement rate limiting to control traffic flow
Use geo-blocking to restrict access from high-risk regions
Regularly update and harden your WordPress core and plugins
By using these advanced methods, you build a strong defense against DDoS attacks. This strategy greatly boosts your WordPress site’s ability to withstand threats.
Best WordPress Security Plugins for DDoS Protection
Protecting your WordPress site from DDoS attacks is key in today’s digital world. Let’s look at some top security plugins. They offer strong ddos protection and improve your network security.
Sucuri Security is a top choice. Its premium version blocks 40 million attacks every day with a powerful firewall. It keeps your site safe from DDoS attacks and makes it faster with caching.
WordFence is another favorite, with over 3 million users. It protects against many threats, including DDoS attacks, in its premium version.
For focused DDoS protection, consider Limit Login Attempts Reloaded and Protection Against DDoS. These plugins prevent brute force attacks and fight DDoS threats.
When picking a security plugin, think about WordPress compatibility and your needs. Remember, plugins are great but part of a full security plan. This includes good hosting and regular updates.
Plugin
Key Features
DDoS Protection
Sucuri Security
Firewall, CDN, Daily Updates
Premium Version
WordFence
Malware Scanning, Firewall
Premium Version
Limit Login Attempts Reloaded
Brute Force Protection
Basic Level
Using these plugins and keeping up with security best practices can make your WordPress site much stronger against DDoS attacks.
The Role of Hosting Providers in DDoS Mitigation
Hosting providers are key in fighting off DDoS attacks. They use various strategies and security measures to protect websites. This keeps your online presence safe.
Choosing a host with built-in DDoS protection
When picking a hosting provider, find one with DDoS protection. These hosts have top-notch networking gear and strong data centers. They use traffic filtering and monitoring to catch and stop threats early.
Managed WordPress hosting benefits
Managed WordPress hosting comes with extra security. These services focus on WordPress protection. They offer automatic updates, regular backups, and special firewalls. This can greatly lower the chance of DDoS attacks.
Scalability and resource allocation during attacks
Good hosting providers can scale up and manage resources during attacks. This keeps your website up even when it’s flooded with traffic. Look for hosts that can move malicious traffic and add more resources as needed.
Feature
Standard Hosting
DDoS-Protected Hosting
Traffic Filtering
Basic
Advanced
Network Monitoring
Limited
24/7
Resource Scalability
Fixed
Dynamic
Uptime Guarantee
99.9%
99.99%
Choosing a hosting provider with strong DDoS protection is a smart move for your WordPress site. These providers give you peace of mind. They make sure your website stays online, even against complex attacks.
Conclusion
DDoS attacks are a big threat to both network and WordPress security. They have taken down big names like Netflix, OpenAI, and Spotify, causing a lot of trouble. These attacks can cause minor issues or big financial losses, with an average cost of $218,000 per incident.
To protect your WordPress site, you need a strong defense. Start with basic security steps and add advanced protection. Also, pick a hosting provider you can trust. Keep up with DDoS attack trends, which jumped by 150% worldwide in 2022. Update your security plans to fight different types of attacks, like volumetric, protocol, and application layer ones.
Being proactive and watchful can greatly lower the chance of DDoS attacks. This keeps your WordPress site running smoothly in a tough digital world. Remember, having strong network security is crucial for protecting your online presence and keeping your users’ trust.
FAQ
What is a DDoS attack?
A DDoS attack is when hackers try to flood a server with too much traffic. This makes it hard for the server to work right. They use many computers to send lots of data, overwhelming the server.
What are the common types of DDoS attacks?
There are many kinds of DDoS attacks. Some send lots of data (volumetric attacks). Others use special protocols to flood the server (protocol attacks). Some even use public UDP protocols to boost the attack (amplification attacks).
What are the immediate consequences of DDoS attacks on WordPress websites?
Right away, DDoS attacks can cause your website to go down. This can lead to losing money and making customers unhappy.
What are the long-term effects of DDoS attacks on businesses?
Long-term, DDoS attacks can hurt your brand’s reputation. They can also increase security risks, lead to legal problems, and affect your SEO because of slow performance during attacks.
How can I recognize a DDoS attack in progress?
Look out for sudden spikes in traffic and slow-loading pages. Watch for a flood of requests on certain pages, strange form submissions, and files that won’t load. If your website crashes or shows 504 errors, it might be under attack.
Why are WordPress sites prime targets for DDoS attacks?
WordPress sites are popular targets because they are widely used and sometimes not properly secured. Attacks are getting more common and sophisticated, making WordPress sites an easy target.
What are the essential WordPress DDoS protection measures?
To protect your WordPress site, make sure your hosting is secure. Pick a reliable provider with DDoS protection. Use a Web Application Firewall (WAF) and a Content Delivery Network (CDN). Disable XML-RPC and REST API if you don’t need them. Use strong passwords, keep everything updated, and use two-factor authentication.
What are some advanced techniques for enhanced WordPress DDoS protection?
For better protection, use a Web Application Firewall (WAF) to block suspicious requests. A Content Delivery Network (CDN) can spread your website’s data across many servers. Keep an eye on traffic to catch threats early. Use geo-blocking, IP blocklisting, and harden your WordPress site.
What are some recommended WordPress security plugins for DDoS protection?
For protection, try Sucuri Security with its AntiBot Detection Engine (ADE). WPCode and Disable WP Rest API can also help by stopping REST API for users who aren’t logged in.
How can hosting providers help in DDoS mitigation?
Choose a host that offers DDoS protection and has the right networking hardware. Look for data centers that are scalable and efficient during attacks. Managed WordPress hosting often includes better security and DDoS protection.
Are you an accountant finding it hard to stand out online? In today’s digital age, having a strong web presence is key to attracting new clients and growing your practice. This guide will cover everything you need to know about SEO for accountants, helping you shine online.
Search Engine Optimization (SEO) is a big deal for accounting firms. It’s not just about being online; it’s about being found by the right people at the right time. With most online searches starting with a search engine, SEO is vital for accountants1. By using SEO, accountants can get more online visibility, draw in more qualified leads, and be seen as trusted experts in their field2.
About 70-80% of search engine users look only at organic results, not ads3. This means SEO can help accountants reach a huge number of potential clients who are looking for their services. Plus, websites that rank high on search engines get most of the web traffic, showing how important it is to rank well3.
Key Takeaways
SEO is essential for accountants to increase online visibility and attract clients
Organic search results are more trusted by users than paid ads
Effective SEO strategies can lead to more client leads and engagement
Local SEO is crucial for accountants targeting specific geographic areas
SEO for accountants is a big deal in today’s digital world. It helps your accounting website stand out in search results. When people look for “accounting services” or “tax preparation,” you want your firm to be the first one they see.
What is SEO and why it matters for accounting firms
Search Engine Optimization (SEO) makes your website more visible on search engines like Google. For accounting firms, it’s a great way to draw in new clients. SEO brings in 1,000% more traffic than social media and beats paid ads in getting new leads4.
The impact of SEO on online visibility and client acquisition
A website that’s optimized well is more likely to show up in local search results5. This is key since many accounting firms don’t use SEO well, giving you a chance to stand out6. Using an SEO strategy for accountants puts your firm ahead in a tough market.
Key benefits of implementing SEO strategies
SEO for accountants has many perks:
More website visitors and visibility
Better client finding
A cheaper marketing option
Results that keep going
Using tools like Google Analytics and Search Console helps you see how your site is doing and spot ways to get better5. This way, you can keep making SEO work for you, making it a wise choice for your firm’s growth.
The Challenges of SEO in the Accounting Industry
Accounting firms face unique hurdles in using SEO effectively. With Google being the top search engine, it’s key to stand out online7. There are over 1,000,000 searches each month for accounting services, making it a tough field7.
One big challenge is making content that’s easy to understand but still accurate. Accountants need to explain complex financial ideas in simple terms. This balance is key for good SEO for accountants and their firms.
Local SEO is another big challenge. Since 30% of mobile searches are about finding things nearby, and 78% of those searches lead to visits the same day, firms must be seen locally8. They need to work on both on-page and off-page SEO to be visible.
Getting links from reputable financial sites is hard. Accountants can use guest posting and working with other industry professionals to get quality backlinks.
SEO Challenge
Impact
Solution
Technical Content
Reduced readability
Simplify language while maintaining accuracy
Local Visibility
Missed local clients
Optimize for local searches and Google My Business
Link Building
Lower domain authority
Guest posting and industry partnerships
Technical SEO also challenges many accounting firms. Fast loading times and good site structure are important and need constant work9. If ignored, these can hurt a firm’s online presence and how users experience their site.
Keyword Research for Accounting Firms
Effective keyword research is key for successful SEO in accountancy. It helps you find out what potential clients are looking for. With 51% of all website traffic coming from organic search, it’s vital for accounting firms10.
Identifying relevant keywords for accounting services
Begin by listing terms related to your accounting services. Use tools like Ubersuggest, Ahrefs, and Semrush to grow your list. They provide data on search volume and competition11. For instance, “irs” gets 4,090,000 searches a month, while “certified public accountant” has both info and commercial searches12.
Long-tail keywords and their importance
Long-tail keywords are specific phrases with lower search volume but higher conversion potential. For accountants, these could be “accountant in (CITY)” or “small business tax accountant.” They have less competition, making them easier to rank for in SEO efforts.
Tools for effective keyword research
Here are some tools to help with keyword research:
Google Keyword Planner: Offers search volume and competition data for free
SEMrush: Provides detailed keyword analytics and competitor analysis
Ahrefs: Gives in-depth keyword difficulty scores and content gap analysis
It’s important to balance high-volume and niche keywords for a strong SEO strategy. Choose keywords that match your services and target audience to bring quality traffic to your site10.
Keyword
Monthly Search Volume
Keyword Difficulty
CPC (USD)
irs
4,090,000
N/A
N/A
accounts payable
N/A
72/100
N/A
small business accounting software
N/A
N/A
26.45
tax preparation
N/A
N/A
3.32
On-Page SEO Optimization for Accountant Websites
Accountants should work on making their websites more visible online. A good SEO guide for accountants can greatly improve search rankings and bring in more clients. Since 85% of people look for accounting services online, and 90% don’t go past the first page, on-page SEO is key13.
Key Elements of On-Page Optimization
To boost your accounting website’s SEO, focus on these key points:
Title tags: Make titles that include main keywords
Meta descriptions: Write summaries that make people want to click
Headings: Use H1, H2, and H3 tags to organize your content
URL structure: Keep URLs short and filled with keywords
Using these tips can really help your website do better. For example, using location-specific keywords like “accountant California” can make your site more visible for local searches14.
Content Optimization
When making accounting websites better, focus on creating top-notch, keyword-rich content. Pick 3-5 main keywords or phrases that people might use to find accounting services15. Add these keywords into your content in a way that’s easy to read and includes useful info.
SEO is not a one-time effort but an ongoing process that drives sustainable growth in the long run.
About 70% of clicks on search results go to organic results, not ads13. This shows how important ongoing SEO is for accountants who want to draw in new clients and be seen as experts in their field and area15.
Creating High-Quality Content for Accounting Websites
Quality content is key for successful accounting SEO services. It helps attract and keep clients by offering valuable, engaging, and informative content.
Types of Content That Resonate with Accounting Clients
Accounting firms should create a variety of content to meet different client needs. Blog posts, articles, and videos that answer common questions are great for showing expertise. Adding good stock photos can also make the site look better16.
A “Meet the Team” page with staff bios and photos helps clients feel connected to their financial team. These pages are often visited a lot on accounting sites16. Adding things like QuickBooks Online and AICPA logos can make clients trust you more16.
Balancing Technical Information with Readability
Accounting has complex ideas, but it’s important to make them easy to understand. Good content structure helps keep people interested and lowers bounce rates17. Use clear headings, bullet points, and infographics to simplify hard topics.
Incorporating Keywords Naturally into Content
Putting keywords in the right places is key for SEO in accounting. Add relevant keywords in title tags, meta descriptions, and throughout the content. But always think about making it easy to read and use17.
Content Type
SEO Benefit
Client Engagement
Blog Posts
Improves keyword rankings
Establishes expertise
Staff Bios
Enhances local SEO
Builds trust
Informative Videos
Increases time on site
Simplifies complex topics
Remember, 65% of successful accounting sites update their content often. This shows how important it is to keep your online presence fresh and interesting18. By using these strategies for creating content, accounting firms can boost their SEO and draw in more clients.
Local SEO Strategies for Accountants
Local SEO is a big deal for accountants wanting to be top dogs in their area. By using smart local SEO tactics, accounting firms can get more visible and draw in more clients locally19.
First, claim and make your Google My Business (GMB) listing shine. Make sure it’s filled out right with the right business info, services, and great photos. This is super important for getting better search rankings and being seen more20.
Being consistent is key in local SEO. Make sure your Name, Address, and Phone number (NAP) match everywhere online. Search engines like this consistency to know you’re a real business and relevant to local searches21.
Make content that talks about your area to connect with locals. Write blogs about local tax laws, community events, or financial tips for your area. Doing this helps with SEO and shows you’re a local expert.
Optimize for voice search to capture mobile users
Build backlinks from reputable local websites
Encourage and respond to client reviews quickly
Use schema markup to boost your local SEO
Having a website that works well on mobile is a must today. More people use the internet on their phones, so a site that looks good on all devices is key for good user experience and search rankings1920.
“Local SEO is not just about being found; it’s about being found by the right people at the right time.”
By using these local SEO tips, accountants can get more online visibility, pull in more good leads, and grow their business in their area. A strong accountant SEO plan focused on local optimization can really make your firm stand out in the competitive search engine world.
SEO Accountants Guide: Essential Techniques and Best Practices
In the competitive world of accounting, mastering SEO is key for success. With over 88,000 accounting businesses in the United States, it’s vital to stand out online22. This guide shares important seo tips for accountants to improve their online presence and draw in more clients.
Optimizing Website Structure for Better User Experience
A well-structured website is key for SEO in accounting firms. Make sure your site is easy to navigate with a clear layout. Put your services into logical groups and use clear URLs for each page. This makes it easier for users and search engines to understand your site.
Implementing Schema Markup for Accounting Services
Schema markup is a strong tool for accounting websites. It helps search engines understand your content, which can lead to rich snippets in search results. Use schema to highlight your services, reviews, and contact info. This can boost your visibility in search results and draw in more potential clients.
Leveraging Social Media for SEO Benefits
Social media is crucial for SEO today. For accountants, LinkedIn is a great platform. Share valuable content, interact with your audience, and build a strong online presence. This not only increases website traffic but also creates chances for backlinks, which are key for SEO. In fact, top-ranked websites often have many more backlinks than others23.
SEO is an ongoing effort. Keep updating your content, check your rankings, and tweak your strategy as needed. With these SEO tips for accountants, you’ll be on your way to better online visibility and more clients in the competitive accounting field2322.
Technical SEO Considerations for Accounting Websites
Technical SEO is key for accounting firms to stand out online. In the competitive world of cpa seo, having a strong technical base is crucial. Let’s look at important points to boost your accountancy seo.
Website speed is very important. Sites that load quickly keep users engaged and rank better in searches. Sadly, many accounting sites are slow, losing potential clients18.
Security is a top priority. HTTPS encryption is a must for accounting sites. It keeps client data safe and helps with search rankings. Sites with HTTPS rank higher than those without in the accounting field18.
Being mobile-friendly is a must. With over 60% of Google searches on mobile, having a site that works well on phones is key for a good user experience and more visitors24. But, many accounting sites aren’t ready for mobile18.
Submitting an XML sitemap to Google Search Console can help get more leads. This easy step helps search engines understand your site and index your pages better18.
Use schema markup to make your site more visible in search results
Set up your robots.txt file right to guide search engine crawlers
By focusing on these technical SEO areas, accounting firms can build a strong online presence. Remember, in the world of accountancy seo, small technical changes can make a big difference in visibility and client growth.
Link Building Strategies for Accounting Firms
Link building is key for accounting firms to boost their online presence and draw in potential clients. With over 46,000 accounting firms in the U.S., it’s tough to stand out. That’s why strategic SEO efforts are vital25.
Building Authoritative Backlinks in the Finance Sector
Accounting firms can use several methods to build strong backlinks. Guest posting lets accountants share their knowledge on well-known websites, getting them noticed and earning valuable backlinks25. Another good strategy is fixing broken links on other sites with links to their own content25.
Guest Posting and Industry Collaborations
Guest posting and working with industry partners are great for boosting accounting websites. By writing for respected sites like Accounting Today and Journal of Accountancy, accountants can build trust and get quality backlinks26. These actions not only help with SEO but also bring more relevant visitors to the firm’s site25.
Leveraging Professional Associations for Link Opportunities
Professional associations are a goldmine for link-building for accounting firms. Working with groups like the AICPA can lead to top-notch backlinks26. Firms can also use HARO to connect with journalists and get authoritative links by sharing their financial knowledge25.
By using these strategies, accounting firms can climb up the search engine ranks and get more visible online. This guide shows how important ethical and relevant link building is. It helps build trust and adds lasting value to the firm’s site2527.
Link Building Strategy
Benefits
Examples
Guest Posting
Exposure, Backlinks
Accounting Today, Journal of Accountancy
Broken Link Building
Improved Rankings
Replacing broken links on finance websites
Professional Associations
High-Quality Backlinks
AICPA, National Society of Accountants
HARO
Authoritative Links
Contributing insights to journalists
Measuring SEO Success for Accountants
Tracking SEO performance is key for accounting seo services. By keeping an eye on important metrics, accountants can see how well their strategies work. They can then make smart choices to boost their online presence.
Organic traffic is a key sign of SEO success. It shows how many visitors come to your site from search engines. This tells you how visible your brand is and how well your keywords work28. For accountants, targeting different industries can bring in more organic traffic29.
Keyword rankings are also crucial for SEO in accounting. They show how visible you are in search results for certain queries. This lets you see if your SEO efforts are working28. Tools like SEMrush can help find keywords that are easy to target29.
Metric
Importance
Tools
Organic Traffic
Measures brand visibility
Google Analytics, Search Console
Keyword Rankings
Tracks search result visibility
SEMRush, Ahrefs
Conversion Rate
Measures action-taking visitors
Google Analytics
Bounce Rate
Indicates visitor engagement
Google Analytics
Conversion metrics are key for seeing how many visitors do what you want on your site. This affects your revenue and success28. Adding clear calls-to-action on your pages can help people engage with your services29.
Local SEO matters a lot for accountants. Most internet users look for local businesses online, and many Google searches are for local info19. Creating a Google Business Profile and keeping your business info consistent is key for SEO success29.
By checking these metrics often and tweaking your SEO plan, you can get more people to see your accounting firm online.
Common SEO Mistakes to Avoid in Accounting Websites
Today, making your site mobile-friendly is a must. More than half of internet use comes from mobile devices30. Not optimizing for mobile can hurt user experience and search rankings.
Neglecting Local SEO Elements
For accountants, being seen locally is key. Using location-specific keywords and info on websites boosts local search visibility30. There are 3,600 searches a month for “accountants in London”31, showing how vital local SEO is.
Ignoring Website Speed and Performance
Site speed affects user happiness and search rankings. A one-second delay can cut conversions30. Sadly, 44% of audited sites were slow, hurting their SEO31.
SEO Mistake
Percentage of Accountancy Sites
Impact
Poor Backlink Quality
73%
Reduced Domain Authority
Duplicate Content
70%
Lower Search Rankings
Lack of Internal Linking
67%
Poor Site Structure
Improper Keyword Optimization
60%
Missed Ranking Opportunities
Fixing these mistakes can greatly boost an accountant’s SEO strategy. SEO is a continuous effort that needs ongoing work and updates for lasting success.
Conclusion
SEO for accountants is a key strategy to boost your online presence and draw in more clients. By using smart SEO tactics, you can make your accounting firm more visible online. The main aim is to be in the top 3 spots on search engines32.
Keyword research is key to success. Use tools like Google Ads’ Keyword Planner or SEMRUSH to find keywords your potential clients use32. Long-tail keywords are often less competitive and better for getting clients13. Combine these with on-page optimization, like writing great meta descriptions and using proper header tags, to help your site rank better3213.
Local SEO is vital for accountants, as most clients are local13. Work on your Google My Business listing and create content specific to your area to show up more in local searches. Getting backlinks from respected finance sites can also lift your domain authority and rankings32.
SEO is a long-term investment. It may take time to see changes, but the benefits are worth it33. With steady effort and the right SEO advice, you can keep improving your online visibility. This will help you get more clients and grow your practice without spending a lot on ads13.
FAQ
What is SEO and why is it important for accounting firms?
SEO stands for Search Engine Optimization. It helps websites rank higher in search results. For accounting firms, SEO boosts their online visibility, attracts more clients, and grows their practice. It’s key for credibility, trust, and market edge.
What are some key benefits of SEO for accounting firms?
SEO brings more website traffic and helps get more clients. It strengthens the online presence and is a cost-effective marketing tool. Higher search rankings make accounting firms more visible to potential clients, leading to more business.
What are some challenges faced by accounting firms in implementing SEO?
The accounting field is competitive, making SEO tough. The specialized language and terms make content creation hard. Getting high-quality backlinks and content that speaks to potential clients is also a challenge.
Why is keyword research important for SEO success in the accounting industry?
Keyword research finds the terms clients use to search for accounting services. Targeting these keywords helps optimize content and boosts visibility. Tools like Google Keyword Planner and Ahrefs help find specific accounting keywords.
What elements are essential for effective on-page SEO optimization for accounting websites?
Key on-page SEO elements include title tags, meta descriptions, headings, and URL structure. Using compelling titles and concise meta descriptions helps. Structuring content with headings and keywords improves search engine visibility.
How can accounting firms create high-quality content for SEO?
Create blog posts, articles, and videos that answer client questions. Use visuals like infographics to engage readers. Long, detailed content ranks higher and should include relevant keywords naturally.
Why is local SEO important for accounting firms?
Local SEO helps accounting firms reach clients in specific areas. Claim and optimize a Google My Business listing and ensure consistent NAP across directories. Local content attracts nearby clients.
What are some essential techniques and best practices for SEO success in the accounting industry?
Important techniques include optimizing website structure and using schema markup. Leverage social media, internal linking, and ensure mobile-friendliness and fast loading speeds.
What technical SEO considerations are important for accounting websites?
Technical SEO includes HTTPS encryption, XML sitemaps, and site speed optimization. Ensure mobile-friendliness and correct robots.txt configuration to guide search engine crawlers.
What are some effective link building strategies for accounting firms?
Strategies include guest posting, local business collaborations, and creating shareable content. Reach out for backlinks, use HARO, and participate in forums with website URLs in signatures.
How can accounting firms measure and monitor their SEO performance?
Use Google Analytics and Search Console to track SEO performance. Monitor organic traffic, bounce rate, keyword rankings, and conversion rates. Regularly update content to stay relevant and improve rankings.
What are some common SEO mistakes that accounting firms should avoid?
Avoid ignoring mobile optimization, local SEO, and website speed. Ensure a responsive website, use local SEO, and optimize for speed for better rankings and user experience.
Listen to the Article: Experience the full content by listening to the audio version below.
In the digital world, 75% of Facebook’s traffic used HTTP/3 and QUIC by October 20201. This shows how important advanced CDNs are for website performance and user experience. When choosing a CDN like QUIC.cloud or Cloudflare, your decision is key. It can greatly affect your online success.
This guide thoroughly compares QUIC.cloud and Cloudflare, two top CDNs. We look at what makes each special, how well they work, and how they fit with platforms like WordPress. For anyone from small business owners to big companies, knowing about these CDNs is crucial. It can really improve your site’s speed and how happy users are with it.
We’ll cover everything from how good they are at caching to their support of HTTP/3, security, and what they cost. By the end, you should know enough to pick the best CDN for you. This choice will help make your website faster, safer, and better than your competition’s.
Key Takeaways
QUIC.cloud and Cloudflare are leading CDN providers with unique features and capabilities.
The guide covers performance comparisons, WordPress integration, and security features of both CDNs.
HTTP/3 and QUIC are key for website performance these days.
There are differences in how they handle caching and content optimization.
Choosing based on price and how well they work with what you use is important.
Both CDNs can boost your site’s speed and how it ranks in search engines.
Introduction to CDN Services
CDN services change how fast websites load. They use servers around the world to show content closer to visitors. This makes sites load quicker, making users happy.
CDNs spread website content globally. This cuts server expenses and makes sites work better. QUIC.cloud and Cloudflare are leaders in providing CDN services, offering unique benefits to website owners.
QUIC.cloud’s standard plan has 83 Points of Presence (PoPs), while its free plan offers only 6 PoPs in the US and Europe. Cloudflare has a huge network with 250 data centers2.
QUIC.cloud is known for its great caching. It saves both simple and complex data, unlike Cloudflare’s basic caching. Cloudflare requires additional services for HTML caching, like APO and Super Page Cache2.
The pricing structures for these CDNs differ. QUIC.cloud has a system based on credits, where you may pay 2-8 cents per GB depending on the location. Cloudflare offers plans starting at $20 a month, up to $20023.
Both services work to make websites faster. Cloudflare aims to cut down on time spent talking with servers, while QUIC.cloud uses the Quick UDP Internet Connections protocol to improve speed3.
Setting up Cloudflare is known to be easy. But QUIC.cloud is also user-friendly, with a setup process that takes just 10 minutes. Plus, its DNS verification is usually done in a minute4.
Deciding between Cloudflare and QUIC.cloud depends on what you need. If you want global coverage or super fast caching, both have solid options for making your site faster.
Overview of QUIC.cloud and Cloudflare
CDN providers are key in making websites faster and safer. We’ll look at QUIC.cloud and Cloudflare, two top players in this scene.
What is QUIC.cloud?
QUIC.cloud is made especially for WordPress sites. It comes with things like making images and pages load faster, and it even has unlimited bandwidth on its free plan5. The service uses a network of places around the world to quickly show your website to people who are looking at it5.
One cool thing about QUIC.cloud is how it saves things that change often, which helps your site load faster5. It works great with the LiteSpeed Cache plugin for WordPress, making sure everything, both the stuff that changes and the stuff that stays the same, gets shown quickly5.
What is Cloudflare?
Cloudflare is a big name in the world of CDNs, known for offering many services. More than half of the time, it shows your website right from its storage, saving your main server from doing too much work. This makes your website faster for everyone.
Cloudflare’s APO tool is really handy. It makes sure that when you change things on your website, everyone sees the updated version quickly6. And with Cloudflare’s Reserve, it can keep certain parts forever, which is super helpful in making sure your server doesn’t get too busy6.
Feature
QUIC.cloud
Cloudflare
WordPress Focus
Yes
Partial
Dynamic Content Caching
Yes
Yes (with APO)
Free Plan
Available
Available
Global Network
Yes
Yes
Both QUIC.cloud and Cloudflare bring big benefits for site owners who want to improve their website’s speed and safety. The best choice depends on your specific needs, like working well with WordPress or offering top-notch security.
Performance Comparison: QUIC.cloud vs Cloudflare
QUIC.cloud and Cloudflare differ in important ways. Both are top CDNs. They shine in different ways that matter for your site’s speed and effectiveness.
Loading Speed and Time to First Byte (TTFB)
QUIC.cloud works hard to make sites fast, aiming for less than 100ms wherever you are7. Cloudflare has seen its TTFB rise by 12.4% in tests7. TTFB impacts how users and search engines view your site.
Dynamic and Static Content Caching
QUIC.cloud does well in caching both dynamic and static content75. This boosts load speeds for sites with a lot going on. Cloudflare, however, mostly caches static files. This might not be ideal for sites that change a lot.
Feature
QUIC.cloud
Cloudflare
Dynamic Content Caching
Yes
Limited
Static Content Caching
Yes
Yes
TTFB Improvement
Significant
12.4% increase
What is HTTP/3?
HTTP/3 is a new web protocol that boosts performance. With it, sites load faster. It is good since it overcomes certain web slowdowns. QUIC.cloud and Cloudflare both back HTTP/3. But QUIC.cloud, with its full support for the QUIC protocol, might offer a step ahead in speed7.
QUIC.cloud looks to the future by focusing on HTTP/3 and QUIC. They aim for better speed and security7. This could make QUIC.cloud stand out in the future of web performance over Cloudflare. The race might get interesting as the internet grows.
Integration with WordPress
Integrating WordPress with a cdn is key to making websites faster. QUIC.cloud and Cloudflare both offer tools to help WordPress sites run better. They have different methods for improving site performance8.
QUIC.cloud, WordPress and LiteSpeed Cache Integration
QUIC.cloud works well with WordPress using the LiteSpeed Cache plugin. This setup does dynamic caching and creates critical CSS, making your site much quicker. It can cache both static files and pages that change, which is great for performance8.
Setting this up is easy and takes about 10 minutes for people moving from other CDNs4. Since it’s deeply integrated with WordPress, you get extra benefits without paying more8.
Cloudflare’s APO service is a paid option for better WordPress caching, even for users logged in. It aims to do what QUIC.cloud does with its dynamic caching, making it a strong competitor8.
If you choose Cloudflare, you can link it to WordPress with the LiteSpeed Cache plugin. Yet, this method doesn’t fully cache all HTML pages, so you might need other tools for that9.
Feature
QUIC.cloud
Cloudflare APO
Dynamic Caching
Yes
Yes (with APO)
Critical CSS Generation
Yes (Automatic)
No
Cost
Free Tier Available
$5/month
TTFB Improvement
10x (24ms)
Varies
QUIC.cloud with LiteSpeed Cache does wonders for site speed. It turns TTFB from 231ms to just 24ms, which means your site responds much quicker. This is a big improvement compared to Cloudflare and LiteSpeed Cache working together4.
Security Features
QUIC.cloud and Cloudflare both give strong security features for your site. They protect against online dangers. See what they each offer to help you choose wisely.
DDoS Protection
Not having your website down is key. Cloudflare guards against DDoS attacks for many, including those on the free plan10. It’s trusted by millions to keep their sites secure, big or small.
QUIC.cloud joined the field recently. Since 2021, it’s been stepping up with DDoS protection using special connections10. This makes it good at fighting off different DDoS threats.
Brute Force Protection
Stopping unwanted site entry is a must. QUIC.cloud’s free service includes this protection. It keeps your site safe from intruders10.
With Cloudflare, on paid plans, you get bot protection. This also defends against brute force attacks. Among other things, it’s known for serving big sites and offering top-notch help11.
Both are great for upping your site’s safety. Cloudflare is a bit more detailed, great for the big shots or if your site’s very active. Yet, QUIC.cloud works really well with LiteSpeed, which might fit certain setups better10.
Think about what you really need in security, plus your budget and the tech you already use. Good security keeps your users trusting you and ensures your site is always up.
Image and Content Optimization
QUIC.cloud and Cloudflare bring great tools for making images load faster and delivering content better. These tools are key in making websites work better for users.
Image Optimization Techniques
QUIC.cloud can make images up to 90% smaller than their original size. This is better than free services like SMUSH or EWWW image optimizer12. It means websites can load faster and run smoother. Cloudflare also helps by making images smaller without losing quality on its paid plans10.
QUIC.cloud does something special too. It shows a low-quality image quickly, then loads the high-quality one. This makes it seem like images load faster than they really do.
Content Optimization Features
QUIC.cloud and Cloudflare help speed up websites in different ways. QUIC.cloud works well with the LiteSpeed Cache plugin, making caching better for sites like online shops12. This feature includes special techniques for faster loading.
Cloudflare has its own tool called Automatic Platform Optimization (APO). It does similar things as QUIC.cloud but costs $5 a month for those on the free plan10. Both focus on making key website features better for search engines and visitors.
With QUIC.cloud and Cloudflare, websites can become much faster and rank better on search engines. This is great news for those looking to improve their website’s performance.
Pricing and Plans Comparison
QUIC.cloud and Cloudflare both have great free and paid options. It’s important to look at what each offers closely.
Free Plans
QUIC.cloud’s free plan is strong, with 6 data centers in the US and Europe2. This is a good start for small sites. On the other hand, Cloudflare’s free plan uses 250 data centers. This means it can cover more areas and may be faster worldwide2.
Paid Plans and Features
QUIC.cloud’s paid plans depend on the region, costing between 2 and 8 cents per GB2. The Standard Plan has 83 locations worldwide and includes DDoS protection213. You also get free credits with different tiers:
Cloudflare has plans from free to enterprise level. It offers many internet services. In contrast, QUIC.cloud is great for making WordPress faster. It has tools like image optimization and lazy loading14.
Choosing between QUIC.cloud and Cloudflare depends on what you need and your budget. QUIC.cloud is excellent for WordPress sites. Cloudflare offers more services for all kinds of sites14.
QUIC.cloud vs Cloudflare for Web Performance and SEO
CDN services are key for making websites faster and more secure, helping with search engine rankings. Both QUIC.cloud and Cloudflare are leaders in this field. They boost your site’s speed and keep it safe.
Cloudflare has a huge worldwide network that helps many websites and is great for storing web content15. They have servers in 275 cities across 100 countries, making it one of the world’s largest networks16. This wide coverage means quicker loading times and better scores on web testing for websites anywhere.
QUIC.cloud, meanwhile, focuses on making WordPress sites faster with its tech15. It uses LiteSpeed Web Server to work faster and use memory smartly. Even though its network isn’t as big, QUIC.cloud really boosts WordPress websites’ performance.
All these help with core web vitals and are great for SEO. Cloudflare’s APO lets you cache whole pages to make them load faster, which helps with TTFB17. QUIC.cloud focuses on making WordPress sites load quickly.
Think about what your site needs when deciding between the two. Cloudflare’s big network and useful free plan make it a good fit for many sites16. If your site is on WordPress, QUIC.cloud could give you better results because it’s designed for that.
Choosing QUIC.cloud or Cloudflare can really make a difference for your site’s speed and SEO. It all comes down to what your site is like and what it needs to perform at its best.
Conclusion
In the quic.cloud versus Cloudflare debate, we see two top choices for improving websites. They both work well with LiteSpeed websites. QUIC.cloud stands out for its smooth WordPress connection. Meanwhile, Cloudflare is known for being compatible with a wide range of websites. Your decision on which to go for depends on your website’s specifics.
QUIC.cloud is praised for fitting well with LiteSpeed servers, offering dynamic caching and CSS improvement for WordPress. It is especially good for those using LiteSpeed, and it has a nice free plan. On the other side, Cloudflare is loved for its strong security and the fact it works with many types of servers18.
Both services are up to date with HTTP/3, showing they’re keeping current. More people are using HTTP/3, jumping from 23% to 28% between May 2022 and May 2023. This growth proves its key role in updating website performance19. When deciding on your website’s upgrade, think about the CMS you’re using, your server setup, what security you need, and your budget. Remember, both QUIC.cloud and Cloudflare are great at making your site faster, more attractive to users, and stronger in search results.
FAQ
What is a CDN, and why is it important for website performance?
A Content Delivery Network (CDN) is a network of servers around the world. It improves website speed by storing content closer to users. This means less delay and quicker loading times.
What makes QUIC.cloud different from Cloudflare?
QUIC.cloud focuses on WordPress sites and fully supports HTTP/3 through QUIC. It’s designed to work with LiteSpeed servers. Cloudflare, on the other hand, provides a wider range of services including security, DNS, and protection against DDoS attacks.
How does QUIC.cloud improve Time to First Byte (TTFB)?
QUIC.cloud significantly boosts the TTFB, a key metric for website speed. In a specific study, it cut TTFB from 231ms to just 24ms. It accomplished this through advanced caching and the use of the QUIC protocol.
What is HTTP/3, and how do QUIC.cloud and Cloudflare support it?
HTTP/3 is the newest version of the HTTP protocol, improving performance with the QUIC transport layer. QUIC.cloud fully supports HTTP/3. Cloudflare has seen up to a 12.4% data delivery speed increase with HTTP/3.
How do QUIC.cloud and Cloudflare integrate with WordPress?
QUIC.cloud is deeply integrated with LiteSpeed Cache for WordPress, offering dynamic caching and CSS optimization. Cloudflare has a feature called APO, enhancing WordPress caching for both regular and logged-in users.
What security features do QUIC.cloud and Cloudflare offer?
Cloudflare is strong in DDoS protection, with some features free and others paid. QUIC.cloud adds value with brute force protection, available in their free service.
How do these CDN services handle image and content optimization?
QUIC.cloud has LQIP tech for faster image loading. Cloudflare does lossless image optimization on its paid plans. They both offer tools for content optimization, including minification and compression.
What are the pricing options for QUIC.cloud and Cloudflare?
Both CDNs have free and paid options. QUIC.cloud has more to offer for free, especially if you use LiteSpeed. However, Cloudflare’s paid plans include more advanced features suited for big businesses.
How can using a CDN like QUIC.cloud or Cloudflare benefit SEO?
CDNs enhance website performance, which is vital for SEO. QUIC.cloud’s focus on improving TTFB can boost Google rankings. Cloudflare’s large network and security help meet Core Web Vitals, improving user experience and SEO.
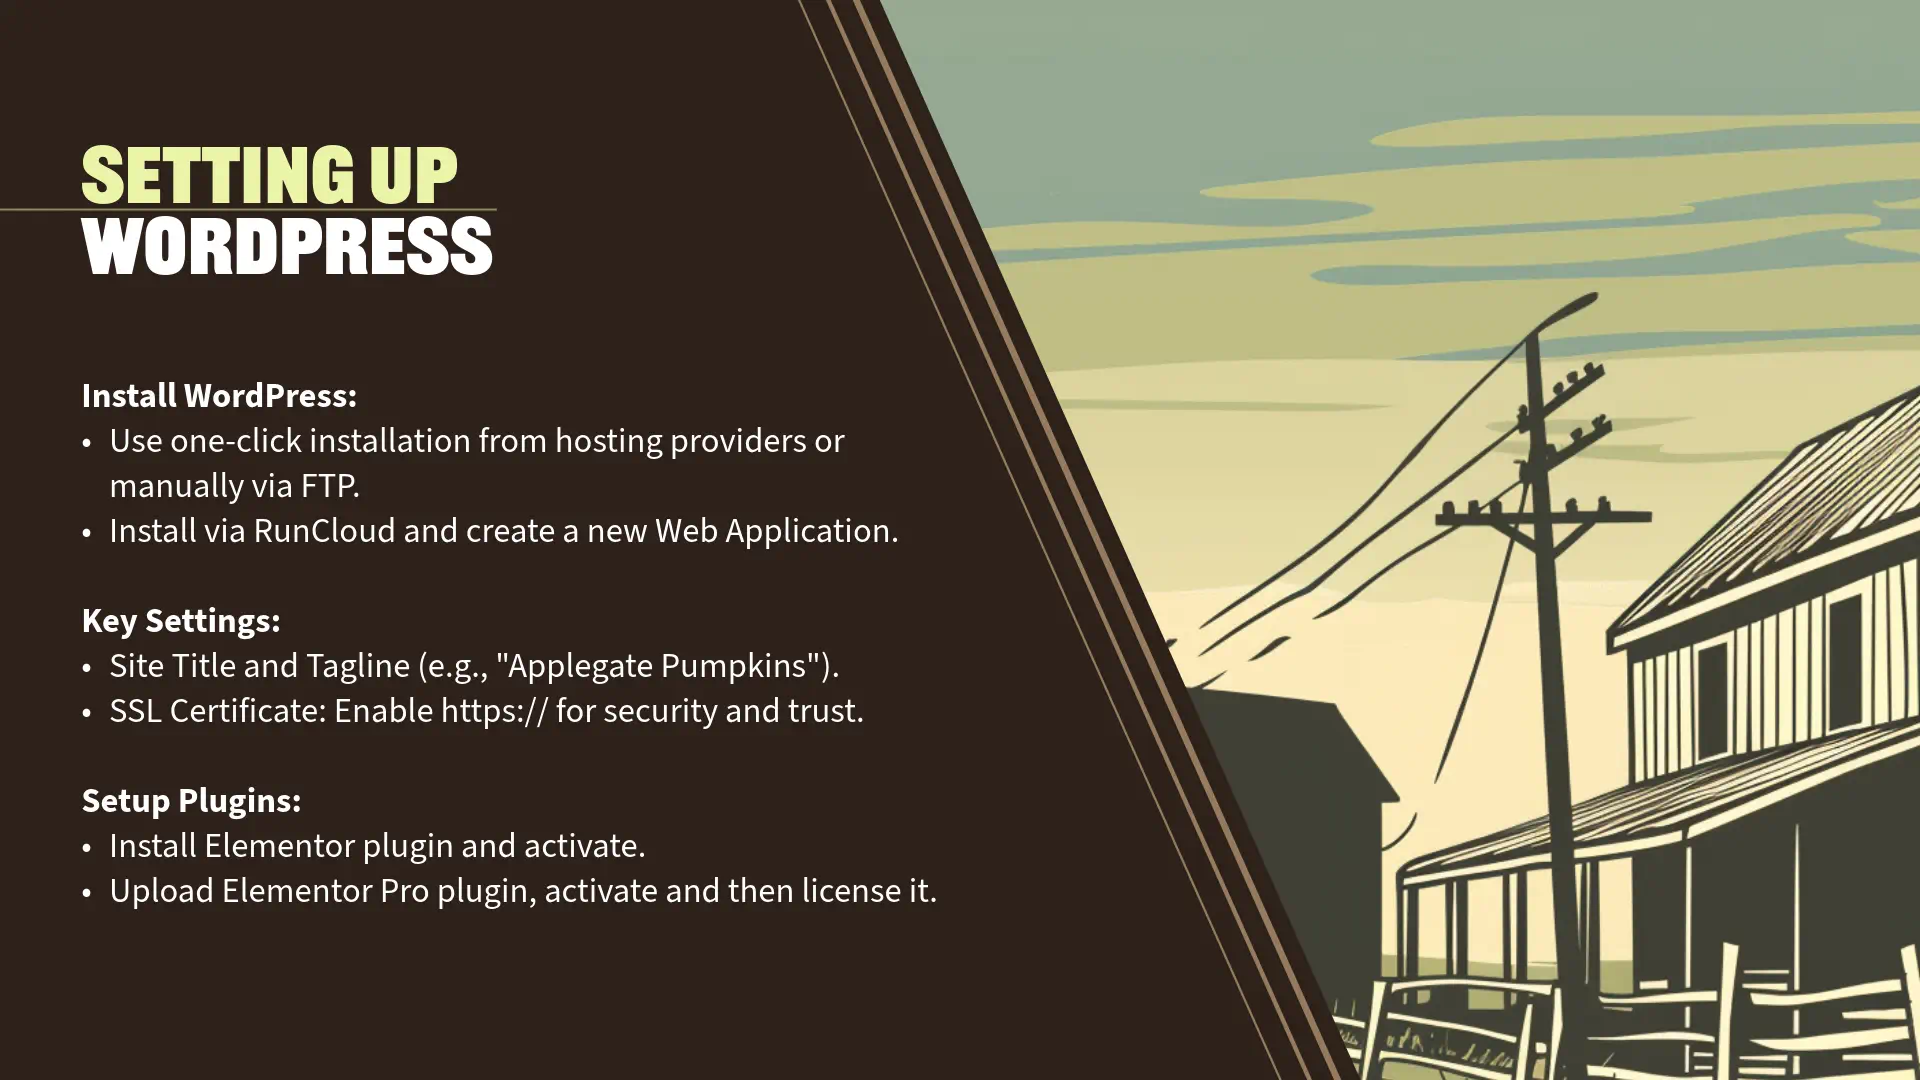
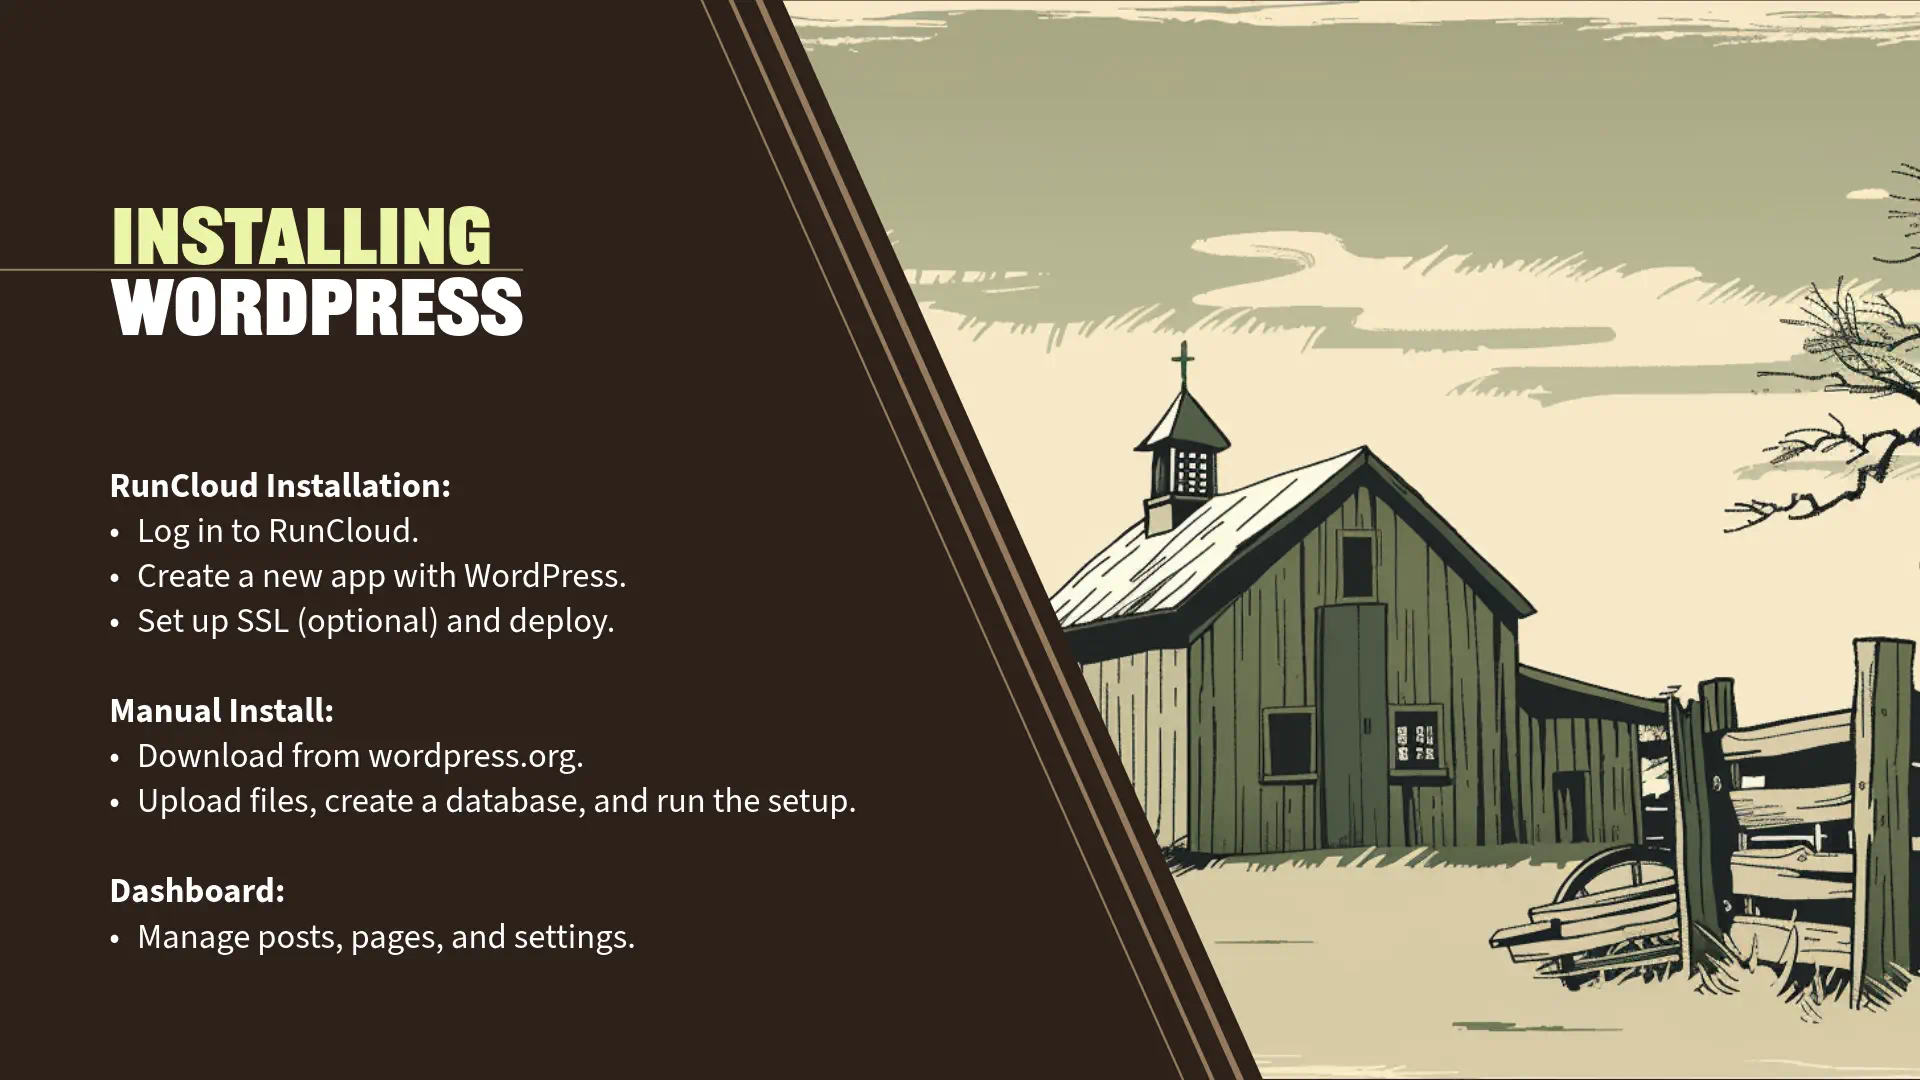

 Facts about WordPress
 Facts about Elementor