Author: Popproxx

  • Wix vs Squarespace vs WordPress: Platform Comparison

    Wix vs Squarespace vs WordPress: Platform Comparison

    Wix vs Squarespace vs WordPress: Platform ComparisonEver thought about which website builder could unlock your online potential? The right platform can make or break your success online. Let’s compare three big names: Wix, Squarespace, and WordPress.

    These giants control about 62% of the web1. They offer special features for various needs, from beautiful designs to strong e-commerce tools.

    WordPress is the leader with 45% of the market1. It’s loved for its flexibility and user base. Wix and Squarespace fight for the top spot in the website builder world, each with unique strengths.

    Wix is known for its easy-to-use interface and huge template library, with over 500 designs2. Squarespace is famous for its sleek designs, offering about 40 free templates that look great2.

    Pricing varies across these platforms. Wix costs between $13 and $39 a month. Squarespace starts at $16 and goes up to $46 for e-commerce2. WordPress is the most affordable, starting at just $3.95 a month2.

    Key Takeaways

    • WordPress dominates with 45% market share
    • Wix offers 500+ customizable templates
    • Squarespace provides 40 free, design-focused templates
    • Pricing varies: Wix ($13-$39), Squarespace ($16-$46), WordPress (from $3.95)
    • Each platform caters to different user needs and skill levels

    Overview of Website Building Platforms

    The world of website building platforms is vast and varied. They cater to all sorts of needs and skill levels. You can find everything from easy drag-and-drop editors to powerful content management systems. These tools help you build your online presence.

    Market Share and Platform Adoption

    WordPress leads the market, with over 40% of the share as the top website builder globally3. Its huge library of themes and plugins makes it very popular. On the other hand, Wix and Squarespace are gaining fans with their simple interfaces and focus on design.

    Key Differences Between Website Builders and CMS

    Website builders like Wix and Squarespace are great for beginners because of their drag-and-drop editors and templates4. Wix has over 800 templates, while Squarespace has about 100 design options3. WordPress, as a CMS, offers more advanced features and customization options, including thousands of themes and plugins43.

    Target Audience for Each Platform

    Wix is perfect for creative professionals who need simple portfolio sites4. It’s easy to use and manage, making it great for beginners5. Squarespace is ideal for small business owners who want more features and customization, with its sleek designs4. WordPress is best for businesses needing lots of features and scalability, thanks to its extensive customization options54.

    Platform Key Strengths Target Audience
    Wix Ease of use, 800+ templates Creative professionals, beginners
    Squarespace Modern design, ~100 templates Small businesses, design-focused users
    WordPress Customization, 10,000+ themes Content-heavy sites, experienced users

    Pricing Comparison and Value Analysis

    Choosing the right platform for your website is important. You need to look at pricing plans and features. Let’s compare the costs of popular ecommerce solutions and web hosting options.

    Wix Pricing Plans and Features

    Wix has different pricing plans for various needs. The cheapest paid plan is $17 per month, and the most expensive is $159 per month for the Business Elite plan6. All paid plans come with a custom domain, free domain for a year, no ads, SSL certificate, and secure payments6. You also get $600 in ad vouchers with paid plans, helping businesses grow online6.

    Squarespace Cost Structure

    Squarespace’s pricing is simple, with plans from $16 to $52 per month if you pay annually7. They have four premium plans for different business needs. Their Commerce Advanced plan is $52 per month, much cheaper than Wix’s Business Elite plan7.

    WordPress Expenses and Hidden Costs

    WordPress.org is free but needs web hosting, which costs less than $10 per month6. It has nearly 60,000 plugins, many free, for customization without extra costs6. WordPress.com offers plans from free to $64.99 per month6.

    Best Value for Different Business Types

    Wix is great for small businesses with its easy-to-use editor and many features6. Squarespace is perfect for creative professionals with its sleek templates and good long-term pricing7. WordPress is best for those who want flexibility and scalability, offering a free platform with endless customization options6.

    Platform Starting Price Max Price Key Features
    Wix $17/month $159/month Custom domain, SSL, ad vouchers
    Squarespace $16/month $52/month Mobile-responsive templates, Fluid Engine
    WordPress.org Free + hosting Varies 60,000+ plugins, full customization

    Ease of Use and Learning Curve

    Website design is all about how easy it is to use. Wix stands out with its drag-and-drop builder. It’s perfect for beginners who don’t need to know tech stuff8. It has over 800 templates, with half for e-commerce, making it easy to start online98.

    Squarespace focuses on simple designs and content blocks. This makes it easy to switch themes without losing your content. It’s great for those who love images and want a simple site8. With over 165 templates, it’s perfect for artists and online stores9.

    WordPress is used by 43% of all websites online. It offers lots of customization options9. While it used to be hard to learn, updates like the Gutenberg editor have made it easier9. It has over 30,000 themes, giving you endless design choices8.

    Platform Templates Ease of Use Best For
    Wix 800+ Very Easy Small businesses, personal sites
    Squarespace 165+ Easy Image-driven brands, artists
    WordPress 30,000+ Moderate Any type, scalable projects

    Wix is great for beginners with its AI chatbot and easy interface. Squarespace and WordPress offer more advanced features but might take more time to learn.

    Design Templates and Customization Options

    Each platform has its own strengths when it comes to website templates and customization. Let’s dive into the design options available on Wix, Squarespace, and WordPress.

    Wix Template Library

    Wix has 836 free templates for different industries and tastes10. These templates are easy to customize with a drag-and-drop editor10. It’s great for creative folks and small businesses looking to make a simple site4.

    Squarespace Design Aesthetics

    Squarespace has 178 free templates with a sleek, modern look10. It’s known for its easy-to-use interface and responsive design104. It’s perfect for small businesses wanting a modern site without needing a developer.

    WordPress Themes and Flexibility

    WordPress offers over 5,000 themes and templates11. For Business or Commerce plans, there are over 12,000 themes from third-party suppliers10. It’s ideal for businesses needing a customized site with lots of features and options4.

    Platform Number of Templates Customization Level Best For
    Wix 836+ High Creative professionals, Simple business sites
    Squarespace 178+ Medium Small businesses, Modern designs
    WordPress 5,000+ (12,000+ for higher plans) Very High Complex websites, Extensive customization

    While all three platforms offer responsive designs, WordPress is best for advanced custom coding10. This makes WordPress perfect for users wanting full control over their site’s design and functionality.

    Wix vs Squarespace vs WordPress: Feature Comparison

    Choosing a website builder means looking at what each offers. Wix, Squarespace, and WordPress each have their own strengths. They cater to different needs and tastes.

    Wix has over 800 design options, making it easy to find the right look. It also has a user-friendly editor and Dev Mode for more advanced changes12.

    Squarespace has fewer templates, but they are high quality. It’s great for professional sites. It also has strong blogging and e-commerce tools, perfect for content creators and online shops10.

    WordPress is all about flexibility and growth. It has thousands of themes and plugins for custom sites. It’s used by over 43% of websites, showing its wide appeal and flexibility12.

    Feature Wix Squarespace WordPress
    Templates 836 free 178 12,000+ (including third-party)
    Apps/Integrations 994 37 50,000+
    Storage Varies by plan Unlimited 6GB to 50GB (expandable)
    Pricing (Monthly) $17-$159 $25-$72 $9-$70

    10

    All three platforms have analytics, SEO tools, and email marketing. Wix has built-in tools, while Squarespace and WordPress offer them through integrations. WordPress has the most options thanks to its plugins.

    Squarespace is the easiest to use, followed by Wix. WordPress is more complex but offers unmatched customization10.

    E-commerce Capabilities and Solutions

    Setting up an online store requires strong e-commerce tools. Let’s see how Wix, Squarespace, and WordPress compare.

    Online Store Features

    Wix has different e-commerce plans for small stores1314. Its Business Basic plan costs $27 a month. It has tools for managing inventory and handling payments11. Squarespace is great for creative entrepreneurs, offering strong e-commerce tools for small to moderate sales13. WordPress, with WooCommerce, is best for growing businesses14.

    Payment Gateway Integration

    Wix, Squarespace, and WordPress all support many payment gateways. This makes transactions smooth for your store. Shopify is also top-notch for conversions and selling on multiple platforms13.

    Product Management Tools

    Good inventory management is key for online stores. Wix has basic tools, while Squarespace has strong in-built features14. WordPress has over 60,000 plugins for the best product management11. This lets businesses customize their inventory systems.

    Platform E-commerce Suitability Template Options App/Plugin Availability
    Wix Small online stores 500+ 600+ apps
    Squarespace Visual-focused businesses 100+ 25 extensions
    WordPress Scalable businesses 5000+ 60,000+ plugins

    WordPress is the best value for money. It has the most tools for online stores of all sizes11.

    SEO and Marketing Features

    Wix, Squarespace, and WordPress each have unique tools for SEO. Wix offers hundreds of templates and designs, improving its SEO tools over time15. It now supports accelerated mobile pages, automatic indexing, and site mapping15.

    Squarespace is known for its sleek, modern templates, perfect for creative industries15. It has free AMP support, SSL certification, and automatic tagging. This makes it great for businesses wanting a professional online look15. Both Wix and Squarespace make it easy for beginners to create websites with their drag-and-drop interfaces16.

    WordPress is unique with over 50,000 third-party plugins for customization15. The Yoast SEO plugin, available only for WordPress, offers advanced features like content silo creation and on-page optimization scoring15. WordPress offers more customization but is considered more complex than Squarespace and Wix16.

    Platform SEO Features Social Media Integration
    Wix Automatic indexing, site mapping, customizable URLs Google Analytics integration
    Squarespace AMP support, automatic tagging, mobile optimization Integrated blogging capabilities
    WordPress Content silo creation, breadcrumbs, structured data Social media image optimization

    Good SEO depends on quality content and links, no matter the platform16. Key practices include keyword research, content marketing, and link building on all platforms16. Choose the platform that best fits your needs and digital marketing skills.

    Platform Integration and Scalability

    Choosing a website builder means looking at app integration, scalability, and growth potential. Let’s see how Wix, Squarespace, and WordPress compare in these areas.

    App Marketplaces and Plugins

    Each platform has its own level of extensibility through apps and plugins. Wix offers 994 apps and integrations. Squarespace has 3710. WordPress, on the other hand, has over 59,000 plugins, giving you lots of options to improve your site17.

    Third-party Integration Options

    Integration options differ among platforms. Wix lets you add HTML, CSS, and JavaScript. Squarespace allows code injections through code blocks10. WordPress, especially on higher plans, offers advanced coding options, making it great for developers1017.

    Platform Apps/Plugins Integration Flexibility
    Wix 994 Moderate
    Squarespace 37 Limited
    WordPress 59,000+ High

    Growth Potential Assessment

    WordPress is the top choice for website growth and scalability. It powers 43.3% of all websites, offering unmatched flexibility for different types of sites17. Wix and Squarespace are great for beginners, but WordPress is best for long-term growth10.

    Conclusion

    Choosing the right platform for your online presence is key today. WordPress powers over 40% of all websites, thanks to its vast library of over 55,000 plugins18. It’s perfect for sites that need lots of customization.

    Wix is great for beginners with its easy drag-and-drop interface19. It has 800+ templates and over 500 web apps in its App Marketplace. This makes it ideal for small businesses needing a quick online presence18. Prices range from $16 to $159 per month, billed annually, fitting various budgets18.

    Squarespace is for creative professionals with its minimalist design and stunning templates19. It has built-in features like blogging, e-commerce, and scheduling. While it’s a bit more technical and pricey, its design focus is unmatched1920.

    When choosing a website builder, think about your skills, budget, and goals. Each platform has its own strengths for building your online presence. By considering these, you can pick the best fit for your digital needs.

    FAQ

    Which platform has the largest market share among Wix, Squarespace, and WordPress?

    WordPress leads with a 45% market share, up 8.9% since 2011. Wix and Squarespace are growing, but WordPress is still the biggest. They’re known for being easy to use.

    How do the pricing plans compare between Wix, Squarespace, and WordPress?

    Wix costs between and 9 a month, with a free option. Squarespace prices range from to a month. WordPress is free but needs hosting, starting at .95 a month, and may cost more for premium features.

    Which platform offers the most design templates?

    WordPress has over 10,000 themes. Wix has 800+ templates, and Squarespace has 150+ themes. WordPress has the most design options.

    How do the e-commerce capabilities compare between the platforms?

    Wix has built-in e-commerce tools like cart recovery and discounts. Squarespace is great for small to moderate sales. WordPress with WooCommerce is best for big sales.

    Which platform is best for SEO?

    All platforms support SEO basics. WordPress has the most SEO control with plugins like Yoast SEO. Wix and Squarespace also have good SEO features.

    How do the platforms compare in terms of ease of use?

    Wix and Squarespace are easy for beginners with drag-and-drop tools. WordPress is more complex but offers more control.

    Which platform offers the most integrations and apps?

    WordPress has over 50,000 plugins. Wix has 500+ integrations, and Squarespace has 40 services. WordPress has the most integrations.

    Can I switch themes after publishing my website?

    Yes, you can switch themes on Squarespace and WordPress after publishing. But Wix templates can’t be changed once your site is live.

    Which platform is best for blogging?

    WordPress is top for blogging, perfect for content-heavy sites. Squarespace also has great blogging features. Wix is good for basic blogging.

    How do the platforms handle mobile responsiveness?

    All platforms have mobile-responsive designs. Wix and Squarespace automatically adjust for mobile. WordPress themes are usually responsive but might need extra tweaks.

    Source Links

    1. Wix vs. Squarespace vs. WordPress: The Showdown
    2. Wix vs. Squarespace vs. WordPress – NerdWallet
    3. Squarespace vs Wix vs WordPress: Which is Better to Use?
    4. WordPress vs Wix vs Squarespace: Which one should you use?
    5. Wix vs. Squarespace vs. WordPress
    6. Wix Vs. WordPress (2024 Comparison)
    7. Wix vs Squarespace: A Battle of the Best Website Builders
    8. Wix vs. Squarespace vs. WordPress: Which One is Best? | Nexcess
    9. Squarespace vs Wix vs WordPress: Which one should you choose?
    10. Wix vs Squarespace vs WordPress — Which is Best?
    11. Wix Vs Squarespace vs WordPress – Which Is Good For You?
    12. Wix vs Squarespace vs WordPress 2024 Comparison: Discover the Best Site Creator
    13. Wix vs WordPress vs Shopify vs Squarespace
    14. Wix vs Squarespace vs WordPress – Oyova
    15. Wix vs WordPress vs Squarespace: Which is Best For SEO?
    16. SEO Comparison: Squarespace vs. WordPress vs. Wix (2021 Update) | Logical
    17. WordPress vs Squarespace vs Wix: Which One is Best in 2024?
    18. What is better WordPress or Wix or Squarespace? – WisdmLabs
    19. Wix vs Squarespace vs WordPress: Comparing Website Builders
    20. Wix Vs Square Space Vs Word Press Which Is Best For Your Business
  • Building Your First Website with WordPress and Elementor: Questions Answers and Next Steps

    Building Your First Website with WordPress and Elementor: Questions Answers and Next Steps

    Q&A and next steps for web design class.

    Section 11: Q&A and Next Steps (5 minutes)

    Recap of Key Learnings

    “Before we wrap up, let’s quickly recap what we’ve covered today:

    1. Understanding Domains and Hosting:
      • The importance of choosing a memorable domain name and reliable hosting.
      • How hosting affects performance, security, and scalability.
    2. Installing WordPress:
      • Installation using RunCloud.
      • Brief overview of manual installation.
      • Navigating the WordPress Dashboard.
    3. Setting Up Your WordPress Site:
      • Updating general settings (site title, tagline, timezone).
      • Configuring permalink settings for SEO-friendly URLs.
    4. Choosing and Installing a Theme:
      • Understanding what a theme is.
      • Installing the ‘Hello Elementor’ theme.
    5. Installing and Activating Elementor:
      • Installing both the free and Pro versions.
      • Activating and licensing Elementor Pro.
      • Discussing the benefits of Elementor Pro.
    6. Building Your Homepage with Elementor:
      • Creating a new page and launching the Elementor editor.
      • Understanding the Elementor interface.
      • Adding sections and widgets.
      • Customizing content and designing layouts.
      • Ensuring responsive design.
    7. Creating Additional Pages:
      • Creating ‘About’ and ‘Contact’ pages.
      • Using Elementor templates.
      • Adding a contact form with Elementor Pro.
    8. Setting Up Navigation Menus:
      • Creating a custom header with Elementor Theme Builder.
      • Incorporating a clickable phone number.
    9. Final Touches and Launching Your Site:
      • Customizing the footer.
      • Previewing the entire site.
      • Running performance and SEO tests.
      • Installing Slim SEO to optimize the site.
      • Publishing the site.
    10. Testing Performance Improvements:
      • Running speed and SEO tests before and after optimization.
      • Understanding the importance of site performance and SEO.

    Additional Resources

    “Building a website is an ongoing journey, and having the right tools and resources can make a significant difference. Here are some recommendations to help you further enhance your WordPress experience:

    Additional Resources

    “Building a website is an ongoing journey of learning and creativity. Here are some valuable resources to help you continue your exploration:

    WordPress Resources:

    • WordPress.org Documentation:
      • Comprehensive guides on using WordPress features.
      • WordPress Documentation
    • WordPress Support Forums:
      • Community-driven forums for asking questions and finding solutions.
      • WordPress Support Forums
    • WordPress TV:
      • Video tutorials and recorded sessions on various WordPress topics.
      • WordPress TV

    Elementor Resources:

    • Elementor Academy:
      • Official tutorials and courses to master Elementor.
      • Elementor Academy
    • Elementor Documentation:
      • Detailed guides on Elementor features and widgets.
      • Elementor Docs
    • Elementor Community Forum:
      • Engage with other Elementor users for tips and support.
      • Elementor Community

    Additional Learning:

    • Online Courses:
      • Udemy: Offers courses on web development and design.
        • Udemy WordPress Courses
      • Coursera: Provides courses from universities on web technologies.
    • Blogs and Articles:
      • WPBeginner: Tips and tutorials for WordPress beginners.
      • Smashing Magazine: Insights on web design and development.
        • Smashing Magazine

    Community Engagement:

    • WordPress Meetups and WordCamps:
      • Attend local events to network and learn.
      • Find a WordPress Meetup
    • Elementor Facebook Group:

    Recommended Web Hosting Providers

    Choosing a reliable web host is crucial for your website’s performance, security, and scalability. Here’s a comparison of some top web hosting providers:

    Web Host Pros Cons
    Elementor Hosting – Optimized for Elementor
    – WordPress and Elementor pre-installed
    – Beginner-friendly interface
    – Fast loading times
    – Limited to WordPress sites
    – Fewer advanced features compared to others
    Kinsta – High performance with Google Cloud Platform
    – Excellent customer support
    – Automatic backups and security features
    – Scalable plans
    – Higher price point
    – No email hosting included
    Rocket.net – Built-in CDN and WAF for speed and security
    – Optimized for WordPress
    – 24/7 expert support
    – User-friendly dashboard
    – Premium pricing
    – May be overkill for small sites
    Hostinger – Affordable pricing
    – Easy-to-use control panel (hPanel)
    – Good performance for the price
    – 24/7 customer support
    – Limited features on basic plans
    – No phone support
    Pressable – Managed WordPress hosting
    – Excellent uptime and speed
    – Collaboration tools for teams
    – Free Jetpack Premium included
    – Can be expensive for smaller sites
    – Limited to WordPress hosting

    Recommended WordPress Plugins

    Enhance your website’s functionality with these essential plugins:

    Plugin Description Pricing Link
    Elementor Pro – Advanced page builder with drag-and-drop interface
    – Includes Theme Builder, Form Builder, WooCommerce Builder
    – Over 50 Pro widgets and templates
    – Enables custom header, footer, and dynamic content design
    Starting at $59/year for a single site Elementor Pro
    WPvivid Backup Plugin – Complete backup and migration solution
    – Schedule automatic backups
    – Supports cloud storage (Google Drive, Dropbox, etc.)
    – One-click restoration
    – Staging and dev environments
    Free version available
    Pro starting at $49/year
    WPvivid Backup Plugin
    SEOPress – Comprehensive SEO plugin
    – Optimize meta titles, descriptions, and keywords
    – XML and HTML sitemaps
    – Google Analytics integration
    – WooCommerce support
    – Content analysis and readability checks
    Free version available
    Pro at $49/year for unlimited sites
    SEOPress
    Slim SEO – Lightweight SEO plugin
    – Automated meta tags generation
    – XML sitemap support
    – Breadcrumbs integration
    – No configuration needed
    – Ideal for beginners who want a simple SEO solution
    Free Slim SEO


    YouTube Tutorials and Channels

    Further your learning with these helpful video resources:

    • Elementor Official Channel
    • Complete Elementor PRO and WordPress Tutorial for Beginners 2024
      • A comprehensive guide to building websites using Elementor Pro.
      • Watch on YouTube
    • How to Make a WordPress Website with Elementor in 2024
      • Step-by-step tutorial on creating a WordPress website using Elementor.
      • Watch on YouTube
    • How to Properly Layout a Website (For Beginners)
      • Learn best practices for website layout and design principles.
      • Watch on YouTube
    • Complete Layout Guide
      • An in-depth look at creating effective website layouts with Elementor.
      • Watch on YouTube
    • Elementor Flexbox Container Tutorial | Use It The RIGHT WAY!
      • Master the use of Flexbox Containers in Elementor for responsive design.
      • Watch on YouTube

    Encouragement

    “Building a website is a rewarding journey that combines creativity and technical skills. Remember:

    • Practice Makes Perfect:
      • The more you work with WordPress and Elementor, the more proficient you’ll become.
    • Stay Curious:
      • Continuously explore new features, plugins, and design trends.
    • Engage with the Community:
      • Join forums, attend webinars, and participate in discussions to learn from others.
    • Don’t Be Afraid to Experiment:
      • Try different layouts and functionalities to see what works best for your audience.

    Your website is a reflection of your vision—keep refining it to make it the best it can be!”

    Open Floor for Questions

    “Now, I’d like to open the floor for any questions you may have:

    • Do you need clarification on any of the steps we covered?
    • Are there specific features or plugins you’re curious about?
    • Would you like advice on best practices or troubleshooting?

    Feel free to ask anything, and I’ll be happy to provide answers and guidance.”

    Closing Remarks

    “Thank you all for your active participation and enthusiasm throughout this workshop. It’s been a pleasure guiding you through the process of building a website with WordPress and Elementor.

    Remember, every expert was once a beginner. Keep exploring, keep learning, and most importantly, enjoy the journey.

    I look forward to seeing the amazing websites you’ll create. Don’t hesitate to share your progress or reach out if you need support.

    Happy building, and best of luck on your web development endeavors!”

  • Building Your First Website with WordPress and Elementor: Final Touches and Launching Your Site

    Building Your First Website with WordPress and Elementor: Final Touches and Launching Your Site

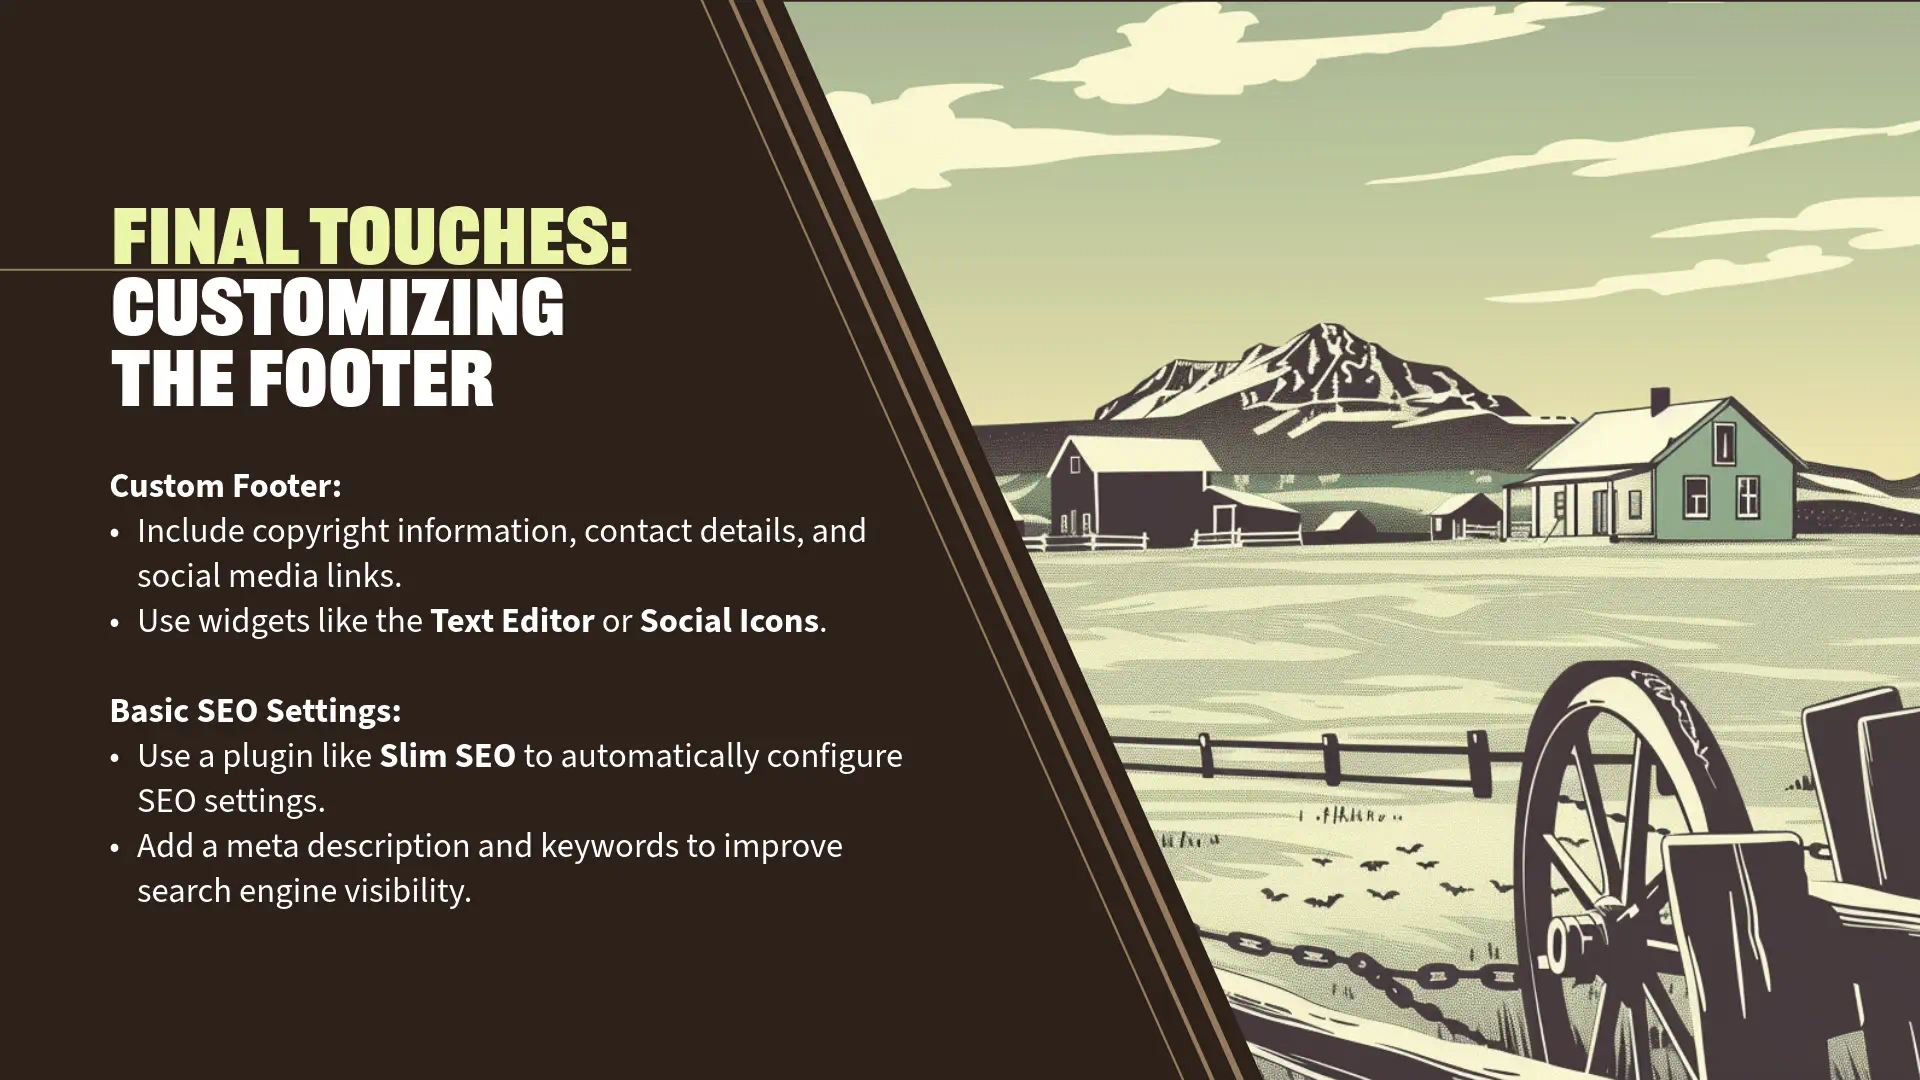
    Tips for customizing website footer and SEO settings.

    Section 10: Final Touches and Launching Your Site (5 minutes)

    Customizing the Footer

    “Now that your website’s main content is in place, it’s important to focus on the footer. The footer often contains essential information like copyright notices, additional navigation links, or contact details.

    Editing the Footer with Elementor Theme Builder

    Step 1: Access Elementor Theme Builder

    • Navigate to ‘Templates’ > ‘Theme Builder’ in your WordPress Dashboard.
    • Click on ‘Footer’ to create a new footer template.
      • If you already have a footer template, you can edit it directly.

    Step 2: Create a New Footer Template

    • Click ‘Add New’ and select ‘Footer’ from the dropdown menu.
      • Name Your Template: Enter a name like ‘Main Footer’.
    • Click ‘Create Template’.

    Step 3: Design the Footer

    • Add a Section:
      • Click the ‘+’ icon to add a new section.
      • Choose a one-column or multi-column structure based on your preference.
    • Insert Widgets:
      • Text Editor Widget:
        • Drag the ‘Text Editor’ widget into the section.
        • Add your copyright information, e.g., “© 2023 Applegate Pumpkins. All rights reserved.”
      • Social Icons Widget (Optional):
        • Add social media links by dragging the ‘Social Icons’ widget.
      • Navigation Menu (Optional):
        • Include a footer menu by adding the ‘Nav Menu’ widget.
    • Style the Footer:
      • Customize text, background colors, and spacing to match your site’s branding.
    • Responsive Design:
      • Switch to ‘Mobile’ view and adjust elements to ensure the footer looks good on all devices.

    Step 4: Publish the Footer Template

    • Click ‘Publish’.
    • Set Display Conditions:
      • Choose ‘Include > Entire Site’.
    • Click ‘Save & Close’.

    Previewing the Site

    “With the footer customized, let’s review your entire website to ensure everything looks and functions as intended.

    Website testing and launch tips.

    Step 1: Visit Your Website

    • From the WordPress Dashboard, click on your site name at the top to visit the front end.
    • Navigate through each page (‘Home’, ‘About’, ‘Contact’).

    Step 2: Check for Consistency and Functionality

    • Verify that all text, images, and links are correct.
    • Test forms and interactive elements.
    • Ensure the site is responsive on different devices.

    Testing Site Performance and SEO Before Optimization

    “Before optimizing further, let’s assess our site’s current performance and SEO readiness using Google PageSpeed Insights at pagespeed.web.dev.

    Step 1: Run a Speed and SEO Test

    • Access PageSpeed Insights:
    • Enter Your Site’s URL:
    • Click ‘Analyze’:
      • The tool will analyze your site for both mobile and desktop.

    Step 2: Review the Results

    • Performance Scores:
      • You’ll receive scores for Performance, Accessibility, Best Practices, and SEO.
      • In our initial test, the SEO score is 85 out of 100.
    • Understanding the Scores:
      • Performance: Measures load times and responsiveness.
      • Accessibility: Evaluates how accessible your site is to all users.
      • Best Practices: Checks adherence to web development standards.
      • SEO: Assesses how well your site is optimized for search engines.

    Why These Scores Matter

    • User Experience:
      • Faster, more accessible sites retain visitors longer.
    • Search Engine Ranking:
      • Higher scores can improve your position in search results, increasing visibility.

    Basic SEO Settings and Re-testing Performance

    “To improve our SEO score, we’ll install an SEO plugin. Let’s proceed with installing Slim SEO.

    Installing Slim SEO Plugin

    Step 1: Install and Activate Slim SEO

    • Navigate to ‘Plugins’ > ‘Add New’.
    • Search for ‘Slim SEO’.
    • Click ‘Install Now’ next to Slim SEO by eLightUp.
    • Click ‘Activate’.

    Step 2: Configure Slim SEO

    • Automatic Configuration:
      • Slim SEO works out of the box with minimal setup.
    • Access Plugin Settings:
      • Go to ‘SEO’ in your WordPress Dashboard.
    • Set Global Meta Tags:
      • Homepage Meta Description:
        • Write a compelling description, e.g., “Experience the magic of harvest season at Applegate Pumpkins. Join us for family fun in Applegate Valley!”

    Re-testing Site Performance After Optimization

    “Now that Slim SEO is installed, let’s see how it has affected our site’s SEO score.

    Step 1: Run the Speed and SEO Test Again

    Step 2: Review the New Results

    • Improved SEO Score:
      • The SEO score has increased to 92 out of 100.
    • Understanding the Improvement:
      • Slim SEO adds essential meta tags and optimizes site structure, enhancing SEO.
    • Other Performance Metrics:
      • Check if other scores have improved and note any remaining issues.

    Why This Matters

    • Enhanced Visibility:
      • A higher SEO score means search engines can better understand and rank your site.
    • Better User Experience:
      • Optimizations often improve site speed and accessibility.
    • Competitive Advantage:
      • Outperforming competitors in SEO can lead to more traffic.

    Publishing the Site

    “With improvements in place, it’s time to make your site live.

    Step 1: Disable Maintenance Mode

    • If using Elementor’s Maintenance Mode:
      • Go to ‘Elementor’ > ‘Tools’.
      • Click the ‘Maintenance Mode’ tab.
      • Set ‘Mode’ to ‘Disabled’.
      • Click ‘Save Changes’.

    Step 2: Ensure Site Visibility

    • Go to ‘Settings’ > ‘Reading’.
    • Make sure ‘Discourage search engines from indexing this site’ is unchecked.
    • Click ‘Save Changes’ if you made any changes.

    Additional SEO Tips

    • Use Descriptive URLs:
      • With ‘Post Name’ permalinks, your URLs are already SEO-friendly.
    • Optimize Images:
      • Add alt text and compress images for faster load times.
    • Create Quality Content:
      • Regularly update your site with valuable information.
    • Internal Linking:
      • Link between pages to improve navigation and SEO.

    Engagement Opportunity

    “Optimizing your site not only improves performance but also enhances user satisfaction.

    • Monitor Progress:
      • Regularly check your site’s performance and SEO scores.
    • Stay Updated:
      • Keep plugins and content up to date for security and relevancy.
    • Engage with Your Audience:
      • Use analytics to understand visitor behavior and preferences.

    Personal Insights

    “Seeing the SEO score improve from 85 to 92 after installing Slim SEO is a tangible demonstration of how small optimizations can make a significant impact.

    • Confidence Boost:
      • Improvements validate your efforts and encourage continued optimization.
    • User Trust:
      • A well-optimized site appears more professional, building trust with visitors.
    • Search Engine Ranking:
      • Even slight increases in SEO scores can positively affect your search rankings over time.

    Transition to Conclusion

    “Congratulations on launching your optimized website! You’ve learned how to build, customize, and enhance your site using WordPress and Elementor.

    In our final segment, we’ll summarize the key takeaways, provide additional resources, and address any questions you might have.

    Let’s wrap up and look forward to your website’s success!”

  • Building Your First Website with WordPress and Elementor: Setting Up Navigation Menus

    Building Your First Website with WordPress and Elementor: Setting Up Navigation Menus

    Steps for setting up navigation menus.

    Section 9: Setting Up Navigation Menus (5 minutes)

    Creating a Menu

    “Now that we have our key pages created, it’s essential to set up a navigation menu to help visitors easily navigate your website. Instead of using the default theme location, we’ll leverage Elementor’s Theme Builder to create a custom header that includes your logo, navigation menu, and a clickable phone number for immediate contact.

    Adding a Phone Number as a Custom Menu Item

    Step 1: Edit the ‘Main Menu’

    • From your WordPress Dashboard, navigate to ‘Appearance’ > ‘Menus’.
      • If you haven’t created a menu yet, follow these steps:
        • Create a Menu:
          • Enter ‘Main Menu’ in the ‘Menu Name’ field.
          • Click ‘Create Menu’.
    • Add Pages to the Menu:
      • In the ‘Add menu items’ section, select ‘Pages’.
      • Check the boxes next to ‘Home’, ‘About’, and ‘Contact’.
      • Click ‘Add to Menu’.
    • Add Phone Number as a Custom Link:
      • Click on ‘Custom Links’ in the ‘Add menu items’ section.
        • URL:
          • Enter tel:(555)123-4567.
            • This creates a clickable link that initiates a phone call on devices that support telephony links (like smartphones).
        • Link Text:
          • Enter (555) 123-4567.
      • Click ‘Add to Menu’.
    • Arrange Menu Items:
      • In the ‘Menu Structure’ area, drag and drop the menu items to arrange them:
        • Place the phone number at the end or in a prominent position that makes sense for your site.
    • Save the Menu:
      • Click ‘Save Menu’ to apply your changes.

    Creating a Custom Header with Elementor Theme Builder

    Step 2: Access Elementor Theme Builder

    • Navigate to ‘Templates’ > ‘Theme Builder’ in your WordPress Dashboard.
    • Click on ‘Add New’ and select ‘Header’ from the dropdown menu.
      • Name Your Template:
        • Enter a name like ‘Main Header’ for easy reference.
      • Click ‘Create Template’.

    Step 3: Build the Header Structure

    • Close the Template Library:
      • If prompted with pre-designed templates, you can choose one or close the library to start from scratch.
    • Add a New Section:
      • Click the ‘+’ icon to add a new section.
    • Choose a Two-Column Structure:
      • Select the structure with two columns.
        • This allows you to place the logo on the left and the menu (with phone number) on the right.

    Step 4: Insert the Site Logo

    • Drag the ‘Site Logo’ Widget:
      • From the Widgets Panel on the left, find the ‘Site Logo’ widget (under ‘Site’ or ‘Theme Elements’).
      • Drag it into the left column.
    • Configure the Logo:
      • Content Tab:
        • If you have set a logo in your site’s settings, it will display automatically.
        • If not, click ‘Choose Image’ to upload your logo.
      • Style Tab:
        • Adjust the width, max width, and alignment as needed.
        • Set the padding and margin under the ‘Advanced’ tab for proper spacing.

    Step 5: Insert the Navigation Menu

    • Drag the ‘Nav Menu’ Widget:
      • Locate the ‘Nav Menu’ widget (available with Elementor Pro).
      • Drag it into the right column.
    • Select Your Menu:
      • In the ‘Content’ tab, choose ‘Main Menu’ from the ‘Menu’ dropdown.
    • Set Layout and Alignment:
      • Layout:
        • Choose ‘Horizontal’.
      • Align:
        • Set the alignment to ‘Right’.
    • Style the Menu:
      • Navigate to the ‘Style’ tab.
        • Typography:
          • Adjust the font family, size, weight, and color to match your site’s branding.
        • Dropdowns and Mobile Menu:
          • Customize if you plan to have submenus or need mobile responsiveness.

    Step 6: Ensure the Phone Number Appears Correctly

    • The phone number added as a custom link in your menu will now display alongside your other menu items.
    • Style the Phone Number:
      • While Elementor’s ‘Nav Menu’ widget styles all menu items uniformly, you can use custom CSS to style the phone number differently if desired.
    • Optional – Add an Icon Next to the Phone Number:
      • To make the phone number stand out, you can add a phone icon:
        • In ‘Appearance’ > ‘Menus’, expand the phone number menu item.
        • Enable ‘CSS Classes’ via ‘Screen Options’ at the top if not already visible.
        • Add a CSS class like ‘phone-number’.
        • Back in Elementor, you can use custom CSS to target this class and add a background image or icon.

    Step 7: Make the Header Responsive

    • Switch to Mobile View:
      • Click on the ‘Responsive Mode’ icon (monitor icon) at the bottom left.
      • Select ‘Mobile’.
    • Adjust Mobile Menu Settings:
      • In the ‘Nav Menu’ widget settings:
        • Content Tab:
          • Under ‘Layout’, ensure ‘Dropdown’ or ‘Toggle’ is selected for mobile devices.
          • Customize the ‘Toggle Button’ if you prefer a different icon or style.
      • Style Tab:
        • Adjust typography, spacing, and colors for the mobile menu.
    • Check the Logo Alignment:
      • Ensure the logo is appropriately sized and aligned on mobile devices.
    • Adjust Spacing:
      • Use the ‘Advanced’ tab to adjust padding and margins for elements on mobile.

    Step 8: Publish the Header Template

    • Click ‘Publish’:
      • After completing the header design, click the ‘Publish’ button.
    • Set Display Conditions:
      • When prompted, set the display conditions:
        • Include > Entire Site
          • This ensures the header appears on all pages.
      • Click ‘Save & Close’.

    Verifying the Custom Header on Your Site

    Step 9: View Your Site

    • Visit the Front End:
      • Navigate to your site’s homepage.
    • Check the Header:
      • Ensure the logo is on the left, and the menu items, including the phone number, are on the right.
    • Test the Phone Number Link:
      • On a mobile device, tap the phone number to see if it prompts a call.
        • On desktop, clicking the link may prompt you to choose an application to make the call.

    Step 10: Final Adjustments

    • Fine-Tune Design:
      • If any elements need adjustment, return to the Elementor editor via ‘Templates’ > ‘Theme Builder’.
      • Edit the header template and make necessary changes.
    • Update and Refresh:
      • Click ‘Update’ after making changes.
      • Refresh your site to see the updates.

    Engagement Opportunity

    “Creating a custom header using Elementor’s Theme Builder offers several advantages:

    • Brand Identity:
      • A custom header allows you to align the design closely with your brand, enhancing recognition.
    • Enhanced Functionality:
      • Including a clickable phone number directly in the header makes it easy for visitors to contact you, potentially increasing conversions.
    • Improved User Experience:
      • A well-designed header with clear navigation helps visitors find information quickly and encourages them to explore your site further.

    Personal Insights

    “For our Applegate Pumpkins website:

    • Accessibility:
      • Having the phone number prominently displayed ensures visitors can easily reach out for event information or inquiries.
    • Mobile-Friendly Design:
      • Since many users access websites on mobile devices, a responsive header with a clickable phone number enhances usability.
    • Visual Appeal:
      • Placing the logo prominently reinforces brand identity and gives a professional appearance.

    Tips for a Successful Header Design

    • Consistency:
      • Use consistent colors, fonts, and styles to maintain a cohesive look across your site.
    • Simplicity:
      • Keep the header clean and uncluttered to avoid overwhelming visitors.
    • Hierarchy:
      • Prioritize elements based on importance—logo, navigation menu, and contact information.
    • Testing:
      • Always preview your header on different devices to ensure it looks and functions as intended.

    Transition to Next Section

    “Fantastic work! You’ve now set up a custom header that not only enhances the visual appeal of your website but also improves functionality by making navigation and contact options readily accessible.

    In the next and final section, we’ll focus on adding the finishing touches and preparing your site for launch. We’ll customize the footer, review the site to ensure everything is in place, and discuss basic SEO settings to enhance your site’s visibility.

    Let’s proceed to get your website ready for the world!”


  • Building Your First Website with WordPress and Elementor: Creating Additional Pages

    Building Your First Website with WordPress and Elementor: Creating Additional Pages

    About Us and Contact Pages Information

    Section 8: Creating Additional Pages (5 minutes)

    About and Contact Pages

    “Now that we’ve crafted an engaging homepage, it’s essential to provide visitors with more information about who you are and how they can reach you. We’ll create two fundamental pages: ‘About’ and ‘Contact’.

    Creating the ‘About’ Page

    Step 1: Create a New Page

    • Navigate to your WordPress Dashboard.
    • Go to ‘Pages’ > ‘Add New’.
    • In the ‘Add Title’ field, enter ‘About’.
    • Click ‘Publish’ to save the page.

    Step 2: Edit with Elementor

    • After publishing, click ‘Edit with Elementor’ to open the page in the Elementor editor.

    Step 3: Use Elementor Templates

    • Access the Template Library:
      • In the Elementor editor, click on the ‘Folder’ icon in the main editing area.
      • This opens the Template Library, which contains a variety of pre-designed templates.
    • Select a Template:
      • Browse through the ‘Pages’ tab to find an ‘About’ page template.
      • You can filter templates or use the search bar to find one that suits your style.
      • Note that some templates are marked as ‘Pro’, requiring Elementor Pro.
    • Insert the Template:
      • Click on your chosen template and then click ‘Insert’.
      • If prompted, connect your Elementor account to access the template library.

    Step 4: Customize the Template

    • Replace Content:
      • Click on any text to edit it directly.
      • Share your story, mission, or background information.
    • Update Images:
      • Click on image placeholders.
      • In the ‘Content’ tab, click ‘Choose Image’ to upload your own photos or select from the media library.
    • Adjust Styles:
      • Use the ‘Style’ tab to change fonts, colors, and other design elements to match your brand.

    Step 5: Save Your Changes

    • Once satisfied with your customizations, click ‘Update’ to save the page.

    Creating the ‘Contact’ Page

    Step 1: Create a New Page

    • Go back to your WordPress Dashboard.
    • Navigate to ‘Pages’ > ‘Add New’.
    • Enter ‘Contact’ in the ‘Add Title’ field.
    • Click ‘Publish’.

    Step 2: Edit with Elementor

    • Click ‘Edit with Elementor’ to open the page editor.

    Step 3: Use Elementor Templates

    • Access the Template Library:
      • Click on the ‘Folder’ icon.
    • Select a Template:
      • Browse to find a ‘Contact’ page template.
      • Choose a template that includes a contact form or space to add one.
    • Insert the Template:
      • Click ‘Insert’ to add it to your page.

    Step 4: Customize the Template

    • Edit Text and Images:
      • Update contact information such as address, phone number, and email.
      • Replace any placeholder images with relevant visuals.
    • Adjust Design Elements:
      • Use the ‘Style’ and ‘Advanced’ tabs to tweak margins, padding, and other design aspects.

    Contact Form Integration

    “An effective contact page often includes a form that visitors can fill out to reach you directly. With Elementor Pro’s built-in Form widget, adding a contact form is straightforward.

    Adding a Contact Form Using Elementor Pro’s Form Widget

    Step 1: Add the Form Widget

    • Locate the Form Widget:
      • In the Widgets Panel, scroll down to the ‘Pro’ section.
      • Find the ‘Form’ widget.
    • Drag and Drop:
      • Drag the ‘Form’ widget into your desired location on the Contact page.

    Step 2: Customize the Form Fields

    • Edit Fields:
      • By default, the form includes ‘Name’, ‘Email’, and ‘Message’ fields.
      • To edit a field, click on it in the ‘Form Fields’ section under the ‘Content’ tab.
      • Add New Fields:
        • Click ‘Add Item’ to include additional fields like ‘Subject’ or ‘Phone Number’.
      • Field Settings:
        • Set each field’s Type (e.g., Text, Email, Textarea).
        • Adjust Labels, Placeholders, and toggle Required fields.

    Step 3: Configure Form Settings

    • Actions After Submit:
      • Determine what happens when a visitor submits the form.
      • Common actions include ‘Email’ (sends form data to your email) and ‘Redirect’ (takes the user to a thank-you page).
    • Email Settings:
      • Under ‘Email’, set:
        • To: Your email address where you want to receive form submissions.
        • Subject: The email subject line.
        • Message: Customize the message content. You can use form field shortcodes to include user inputs.
    • Additional Options:
      • Confirmation Messages: Customize the message shown to users after submission.
      • Email 2: Set up an auto-response to the user if desired.

    Step 4: Style the Form

    • Navigate to the ‘Style’ tab to customize the form’s appearance.
    • Form Fields:
      • Adjust typography, text color, background color, and borders.
      • Set padding and margins for better spacing.
    • Buttons:
      • Style the submit button to match your site’s color scheme.
      • Adjust hover effects for interactivity.
    • Additional Styling:
      • Customize error messages, labels, and placeholders.

    Step 5: Ensure Responsiveness

    • Responsive Design:
      • Switch to ‘Mobile’ and ‘Tablet’ views using the responsive mode icon.
      • Adjust styles as needed to ensure the form looks good on all devices.

    Step 6: Save and Test the Form

    • Update the Page:
      • Click ‘Update’ to save your changes.
    • Preview the Page:
      • Click the ‘Preview Changes’ icon (eye icon) to view the page as visitors will see it.
    • Test the Form:
      • Fill out the form and submit it to ensure it’s working correctly.
      • Check your email to confirm you received the submission.

    Engagement Opportunity

    “Adding these pages enhances your website’s credibility and provides essential information to your visitors.

    • About Page Tips:
      • Share your story authentically to build a connection with your audience.
      • Highlight your mission, values, and what sets you apart.
      • Include images or videos to make the page more engaging.
    • Contact Page Tips:
      • Provide clear and multiple ways for visitors to reach you.
      • Include social media links, physical address, and operating hours if applicable.
      • Ensure your contact form is user-friendly and accessible.

    Personal Insights

    “For our Applegate Pumpkins website:

    • About Page:
      • We shared the history of the pumpkin farm, emphasizing our roots in the Applegate Valley community.
      • Included stories about seasonal events and how we celebrate the harvest.
    • Contact Page:
      • Provided our physical address with a Google Maps embed for easy directions.
      • Listed our opening hours during the pumpkin season.
      • Used the Form widget to allow visitors to inquire about group visits or special events.

    Using Elementor Templates

    • Benefits:
      • Time-Saving: Templates expedite the design process, allowing you to focus on content.
      • Professional Design: Leverage designs crafted by professionals to enhance your site’s aesthetics.
      • Customization: Templates are fully editable, so you can tailor them to fit your brand identity.
    • Tips:
      • Choose templates that align with your site’s theme and purpose.
      • Don’t hesitate to mix and match sections from different templates.
      • Always replace placeholder content with your own to maintain authenticity.

    Transition to Next Section

    “By creating the ‘About’ and ‘Contact’ pages, you’ve added significant value to your website, providing visitors with more ways to learn about and connect with you.

    In the next section, we’ll focus on setting up navigation menus to help users easily find these pages and navigate your site effortlessly.

    Let’s continue building and refining your website to enhance user experience!”

  • Building Your First Website with WordPress and Elementor: Building Your Homepage with Elementor

    Building Your First Website with WordPress and Elementor: Building Your Homepage with Elementor

    Building pages with Elementor tutorial

    Section 7: Building Your Homepage with Elementor (15 minutes)

    Creating a New Page

    “Now that we have Elementor Pro installed and activated, we’re ready to start building our homepage. Let’s begin by creating a new page in WordPress.

    Step 1: Navigate to Pages

    • From your WordPress Dashboard, go to ‘Pages’ > ‘Add New’.
      • This is where you can create new pages for your site, such as the homepage, about page, contact page, etc.

    Step 2: Title Your Page

    • In the ‘Add New Page’ screen, you’ll see a field at the top labeled ‘Add title’.
      • Enter ‘Home’ as the title of your page.
        • This helps identify the page within your dashboard and can be used in navigation menus.
    • Note: You can leave the content area blank since we’ll be designing the page using Elementor.

    Step 3: Save the Page

    • On the right-hand side, you’ll see the ‘Publish’ panel.
      • Click ‘Publish’ to save your new page.
        • You may need to click ‘Publish’ twice to confirm.
    • Your page is now live, but currently blank.

    Launching Elementor Editor

    “With our ‘Home’ page created, let’s launch the Elementor editor to begin designing.

    Step 1: Edit with Elementor

    • After publishing the page, you’ll see a button labeled ‘Edit with Elementor’.
      • Click on ‘Edit with Elementor’.
        • Alternatively, from the ‘Pages’ list, hover over the ‘Home’ page and click ‘Edit with Elementor’.
    • The Elementor editor will load, displaying a live preview of your page and the Elementor interface.

    Understanding the Elementor Interface

    “Before we start building, let’s familiarize ourselves with the Elementor interface to make the most of its features.

    Main Components of the Interface:

    1. Widgets Panel (Left Side):
      • Contains all the elements you can add to your page.
        • Basic Widgets: Heading, Text Editor, Image, Video, Button, etc.
        • Pro Widgets (with Elementor Pro): Form, Slides, Posts, Portfolio, etc.
      • Search Bar:
        • Quickly find widgets by typing in the name.
      • Navigator:
        • Accessed by right-clicking on an element or via the bottom toolbar, it provides a tree view of all elements on the page.
    2. Editing Area (Main Screen):
      • Displays a live preview of your page as you build it.
      • You can directly add, edit, and rearrange elements here.
    3. Top Toolbar:
      • Elementor Icon (Top Left):
        • Click to access the dashboard, settings, and global styles.
      • Responsive Mode:
        • Toggle between desktop, tablet, and mobile views to adjust design for different devices.
      • Undo/Redo Buttons:
        • Quickly reverse or reapply recent changes.
    4. Bottom Toolbar:
      • Settings (Gear Icon):
        • Adjust page settings like title, status, and featured image.
      • Navigator (Stack Icon):
        • Open the navigator panel for easier element management.
      • History (Clock Icon):
        • View and revert to previous versions or actions.
      • Responsive Mode (Monitor Icon):
        • Another access point for switching device views.
      • Preview Changes (Eye Icon):
        • Open a new tab to preview the page as visitors will see it.
      • Publish/Update Button (Green Button):
        • Save your changes and make them live.

    Adding Sections and Widgets

    “Let’s start building our homepage by adding sections and widgets.

    Step 1: Add a New Section

    • In the Editing Area, click the ‘+’ icon to add a new section.
      • You’ll be prompted to choose a structure.
    • Choose Structure:
      • For now, select a two-column structure by clicking the second option with two columns.
    • A new section with two columns is added to your page.

    Step 2: Add Widgets to the Section

    • Drag and Drop Widgets:
      • From the Widgets Panel, click and drag the ‘Heading’ widget into the column.
        • You’ll see a blue highlight indicating where the widget will be placed.
      • Next, drag the ‘Text Editor’ widget below the heading.
      • Add the ‘Icon List’ widget below the text
      • Finally, add a ‘Button’ widget below the image.
      • Add an ‘Image’ widget to the right column.

    Customizing Content

    “Now, let’s customize each widget to create meaningful content.

    Step 1: Edit the Heading

    • Select the Heading Widget:
      • Click on the heading text in the Editing Area.
    • Edit Content:
      • In the Widgets Panel, under the ‘Content’ tab, replace the default text with ‘Welcome to Applegate Pumpkins’.
    • Style the Heading:
      • Click on the ‘Style’ tab.
        • Typography:
          • Click on ‘Typography’ to adjust font settings.
            • Font Family: Choose a font that matches the theme (e.g., Orelega One).
            • Size: Set the font size (e.g., 48px).
            • Weight: Choose ‘Bold’ or ‘600’ for emphasis.
          • Text Color:
            • Click on the color picker and select a dark gray color (e.g., #54595F).

    Step 2: Edit the Text Editor

    • Select the Text Widget:
      • Click on the paragraph text below the heading.
    • Edit Content:
      • In the ‘Content’ tab, enter a brief description:
        • ” Experience the beauty and bounty of Applegate Valley at our family-owned organic pumpkin farm.”
    • Style the Text:
      • Under the ‘Style’ tab:
        • Typography:
          • Adjust font size (e.g., 18px) for readability.
          • Choose a complementary font (e.g., Open Sans).
        • Text Color:
          • Use a neutral color (e.g., dark grey or brown) for readability.

    Step 3: Add an Image

    • Select the Image Widget:
      • Click on the image placeholder.
    • Choose an Image:
      • In the ‘Content’ tab, click on ‘Choose Image’.
      • Upload an image from your computer or select one from the Media Library.
        • For this demonstration, select the image of a pumpkin farm.
    • Adjust Image Size:
      • Under ‘Image Size’, choose ‘Large’ or a custom size that fits your design.

    Step 4: Edit the Text Editor

    • Select the Text Widget:
      • Click on the paragraph text below the heading.
    • Edit Content:
      • In the ‘Content’ tab, enter a brief description:
        • ” Family-Owned Organic Pumpkin Farm”
      • Highlight the text and make it bold by clicking ‘B’

    Step 5: Edit the Icon List

    • Customize the Icon List
      • Delete the second two items, keeping the checkmark.
      • Duplicate the checkmark twice


    • Add the content to each item
      • “Dedicated to cultivating the finest pumpkins.”
      • “Nurtured by Oregon’s rich soil.”
      • “Committed to sustainable farming practices.”

    Step 5: Customize the Button

    • Select the Button Widget:
      • Click on the button placeholder.
    • Edit Content:
      • In the ‘Content’ tab:
        • Text: Change the button text to ‘Learn More’.
        • Link: Enter a URL where the button should lead (e.g., ‘/about’ or another page you’ll create).
    • Style the Button:
      • Under the ‘Style’ tab:
        • Typography:
          • Adjust font size (e.g., 16px).
        • Text Color and Background Color:
          • Set the text color to dark gray.
          • Set the background color to match the image color (e.g., #CCCB96).
        • Hover Effects:
          • Under ‘Hover’, set the box shadow to all zeros to create an interactive effect.

    Designing Layouts

    “To enhance the visual appeal, let’s adjust the layout and background.

    Step 1: Adjust Column Widths (if using multiple columns)

    • Add a New Section with Two Columns:
      • For variety, let’s add another section with two columns.
      • Click the ‘+’ icon and select the two-column structure.
    • Adjust Column Widths:
      • Hover over the column border until you see the column resize icon.
      • Click and drag to adjust the width ratio (e.g., 70% / 30%).

    Step 2: Change Background Colors and Images

    • Edit Section Settings:
      • Hover over the section and click on the ‘Edit Section’ icon (six dots at the top center).
    • Background Settings:
      • In the Widgets Panel, under the ‘Style’ tab, you can set a background for the section.
        • Background Type:
          • Choose ‘Classic’.
            • Color: Select a soft, warm color (e.g., light orange or beige).
            • Image: Alternatively, you can upload a background image.
        • Background Overlay:
          • Add an overlay to enhance text readability over images.

    Step 3: Add Padding and Margins

    • Spacing:
      • Under the ‘Advanced’ tab of the section or widget, you can adjust padding and margins.
        • Padding: Adds space inside the element.
        • Margin: Adds space outside the element.
      • For example, add padding to the section to increase space around the content (e.g., 50px top and bottom).

    Responsive Design

    “Ensuring your website looks great on all devices is crucial.

    Step 1: Switch to Mobile View

    • Responsive Mode:
      • At the bottom of the Widgets Panel or top toolbar, click on the ‘Responsive Mode’ icon (monitor icon).
      • Select ‘Mobile’ to view how your page looks on a mobile device.

    Step 2: Adjust Elements for Mobile Responsiveness

    • Customize Mobile Layout:
      • Heading Size:
        • Select the Heading widget.
        • Under ‘Style’ > ‘Typography’, adjust the font size specifically for mobile (e.g., 32px).
          • Click on the device icon next to the font size to set different values for desktop, tablet, and mobile.
      • Image Size:
        • Ensure images scale appropriately.
      • Button Alignment:
        • Center-align buttons for better mobile aesthetics.

    Step 3: Check Tablet View

    • Switch to ‘Tablet’ view and make any necessary adjustments, similar to mobile.

    Step 4: Preview and Test

    • Click the ‘Preview Changes’ (eye icon) to see how your page looks in a new tab.
    • Test the responsiveness by resizing your browser window or viewing on actual devices if possible.

    Engagement Opportunity

    Designing your homepage is an exciting process that allows you to express your creativity and connect with your audience.

    • Think About Your Audience:
      • What information are they seeking when they visit your homepage?
      • How can you engage them within the first few seconds?
    • Use High-Quality Images:
      • Visuals are powerful. Use images that are relevant and high-resolution to captivate visitors.
    • Consistent Branding:
      • Maintain consistent use of colors, fonts, and styles that reflect your brand identity.

    Personal Insights

    “For the Applegate Pumpkins homepage:

    • Capturing the Essence:
      • We used warm autumn colors and images of pumpkin patches to evoke the seasonal atmosphere.
    • Clear Call to Action:
      • The ‘Plan Your Visit’ button encourages visitors to learn more and engage with the site.
    • User Experience:
      • By ensuring mobile responsiveness, we’re making sure visitors have a positive experience regardless of the device they use.

    Saving and Publishing

    “Once you’re satisfied with your design:

    • Save Your Work:
      • Click the ‘Update’ button (previously ‘Publish’ if it’s the first time) to save your changes.
    • Preview the Page:
      • Use the ‘Preview Changes’ option to see your live page.

    Transition to Next Section

    “Great job! We’ve successfully built a visually appealing and functional homepage using Elementor.

    In the next section, we’ll create additional pages like ‘About’ and ‘Contact’ to provide more information to your visitors. We’ll also explore how to use Elementor templates to streamline the design process.

    Let’s continue building our website and enhancing the user experience!”

  • Building Your First Website with WordPress and Elementor: Installing and Activating Elementor

    Building Your First Website with WordPress and Elementor: Installing and Activating Elementor

    Introduction to Elementor page builder features.

    Section 6: Installing and Activating Elementor (5 minutes)

    Installing Elementor Plugin

    “With our ‘Hello Elementor’ theme in place, it’s time to harness the power of Elementor to design our website. Elementor is a user-friendly, drag-and-drop page builder that allows you to create stunning web pages without writing a single line of code.

    Step 1: Navigate to the Plugins Section

    • From your WordPress Dashboard, go to ‘Plugins’ > ‘Add New’.

    Step 2: Search for ‘Elementor’

    • In the ‘Search plugins…’ field on the right, type ‘Elementor’.
    • The ‘Elementor Website Builder’ plugin should appear at the top of the search results.
    • Recognize it by the Elementor logo and its high number of active installations.

    Step 3: Install Elementor (Free Version)

    • Click on the ‘Install Now’ button next to the Elementor plugin.
    • WordPress will download and install the plugin, which may take a few moments.

    Step 4: Upload and Install Elementor Pro Plugin

    • Note: Elementor Pro is a premium plugin that extends the functionality of the free version. Since it’s a paid plugin, it cannot be installed directly from the WordPress Plugin Directory. Instead, you’ll need to upload it manually.
    • Download Elementor Pro:
      • Log in to your Elementor account on the Elementor website.
      • Navigate to the ‘Downloads’ section of your account.
      • Download the Elementor Pro plugin file (a .zip file) to your computer.
    • Upload Elementor Pro to WordPress:
      • Back in your WordPress Dashboard, go to ‘Plugins’ > ‘Add New’.
      • Click on the ‘Upload Plugin’ button at the top.
      • Click ‘Choose File’, locate the Elementor Pro .zip file on your computer, and select it.
      • Click ‘Install Now’.
      • WordPress will upload and install the Elementor Pro plugin.

    Activating Elementor

    Step 1: Activate Both Plugins

    • Activate Elementor (Free Version):
      • After installing, the ‘Install Now’ button changes to ‘Activate’.
      • Click ‘Activate’ to activate the Elementor plugin.
      • Alternatively, you can go to ‘Plugins’ > ‘Installed Plugins’, find ‘Elementor’, and click ‘Activate’ if it’s not already active.
    • Activate Elementor Pro:
      • After installing Elementor Pro, click the ‘Activate Plugin’ link that appears.
      • If you missed this step, navigate to ‘Plugins’ > ‘Installed Plugins’, find ‘Elementor Pro’, and click ‘Activate’.

    Important Note:

    • Both the free and Pro versions of Elementor need to be installed and active for Elementor Pro to function correctly. The Pro version extends the capabilities of the free version; it doesn’t replace it.

    Step 2: License Elementor Pro

    • To unlock all the Pro features, you’ll need to activate your Elementor Pro license.
    • Activate License:
      • In your WordPress Dashboard, go to ‘Elementor’ > ‘License’.
      • Click on the ‘Connect & Activate’ button.
      • You will be redirected to the Elementor website and prompted to log in to your Elementor account if you’re not already logged in.
      • After logging in, click ‘Activate’.
      • You will see a confirmation message indicating that your license is active.
      • You will be redirected back to your WordPress Dashboard.
    • Verify Activation:
      • In ‘Elementor’ > ‘License’, you should see a message stating that your license is ‘Active’.

    Elementor Free vs. Pro

    “Now that we have both versions installed and activated, let’s briefly discuss the differences between Elementor Free and Elementor Pro.

    Elementor Free Version:

    • Features:
      • Access to the core drag-and-drop page builder.
      • Over 30 basic widgets, including Text, Image, Video, Button, and Heading.
      • Responsive design capabilities for mobile, tablet, and desktop views.
      • Basic templates and blocks to get you started.
    • Limitations:
      • Limited number of widgets and design capabilities.
      • No access to advanced features like forms, sliders, and custom CSS.
      • Cannot edit theme elements like headers and footers.

    Elementor Pro Version:

    • Additional Features:
      • Pro Widgets:
        • Over 50 advanced widgets, including Forms, Slides, Posts, Portfolio, Pricing Tables, and more.
      • Theme Builder:
        • Design custom headers, footers, single posts, archive pages, and other theme elements using the same intuitive interface.
      • WooCommerce Builder:
        • Create custom product pages and shop layouts if you’re running an online store.
      • Forms and Integrations:
        • Use the Form widget to build contact forms, lead capture forms, and more.
        • Integrate with marketing tools like Mailchimp, HubSpot, and ConvertKit.
      • Global Widgets:
        • Save widgets and sections to reuse across your site, ensuring consistency and saving time.
      • Popup Builder:
        • Create custom popups for promotions, email subscriptions, or announcements.
      • Custom CSS:
        • Add custom CSS directly within the Elementor interface for advanced styling.
      • Premium Templates and Blocks:
        • Access a vast library of professionally designed templates and blocks to accelerate your design process.
    • Why Choose Elementor Pro?
      • Enhanced Design Capabilities:
        • Unlock a wide array of widgets and features that allow for more complex and interactive designs.
      • Time Efficiency:
        • Pre-built templates and global widgets speed up the development process.
      • All-in-One Solution:
        • Reduce the need for additional plugins, simplifying site management and potentially improving performance.
      • Support and Updates:
        • Get premium support from the Elementor team and regular updates with new features.

    Engagement Opportunity

    “Consider how the additional features in Elementor Pro align with your website goals.

    • For Our ‘Applegate Pumpkins’ Site:
      • We’ll use the Form widget to create a contact form, allowing visitors to reach out for event information or inquiries.
      • The Theme Builder enables us to craft a unique header and footer that reflect the autumnal theme and community spirit.
      • Advanced Widgets like Slides and Galleries help us showcase images from the pumpkin patches and events in an engaging way.
      • The Popup Builder can be used to announce special events or promotions, enhancing visitor engagement.
    • Reflect on Your Own Needs:
      • Do you need to collect visitor information through forms?
      • Are you looking to create a unique layout for your blog posts or product pages?
      • Would interactive elements like sliders or animated headlines enhance your site?

    Personal Insights

    “From my experience, upgrading to Elementor Pro significantly elevates the website-building process.

    • Design Freedom:
      • The extensive range of widgets and design options allows for limitless creativity.
      • Being able to customize every part of your site ensures it aligns perfectly with your vision.
    • Simplified Workflow:
      • With all essential tools in one place, managing your site becomes more straightforward.
      • Reducing reliance on multiple plugins minimizes compatibility issues and maintenance.

    Visual Demonstration

    “Let me walk you through the installation and activation process:

    1. Install Elementor (Free Version):
      • Navigate to ‘Plugins’ > ‘Add New’.
      • Search for ‘Elementor’.
      • Click ‘Install Now’, then ‘Activate’.
    2. Install Elementor Pro:
      • Go to ‘Plugins’ > ‘Add New’.
      • Click ‘Upload Plugin’.
      • Select the Elementor Pro .zip file you downloaded.
      • Click ‘Install Now’, then ‘Activate’.
    3. Activate Your License:
      • Navigate to ‘Elementor’ > ‘License’.
      • Click ‘Connect & Activate’.
      • Log in to your Elementor account if prompted.
      • Click ‘Activate’ to confirm.
    4. Verify Activation:
      • Ensure the license status shows as ‘Active’.

    Important Reminders

    • Both Plugins Must Be Active:
      • Remember, both the free and Pro versions of Elementor need to be installed and activated for the Pro features to work.
    • Keep Plugins Updated:
      • Regularly update both plugins to the latest versions to receive new features and security improvements.

    Transition to Next Section

    “Fantastic! With Elementor Pro installed and activated, we now have a powerful toolset at our disposal.

    In the next section, we’ll start building our homepage using Elementor. We’ll explore its intuitive interface, utilize its widgets, and create a visually appealing layout that captures the essence of Applegate Pumpkins.

    Let’s begin the creative process and watch our website come to life!”

  • Building Your First Website with WordPress and Elementor: Choosing and Installing a Theme

    Building Your First Website with WordPress and Elementor: Choosing and Installing a Theme

    Guide for Choosing and Installing a WordPress Theme

    Section 5: Choosing and Installing a Theme (5 minutes)

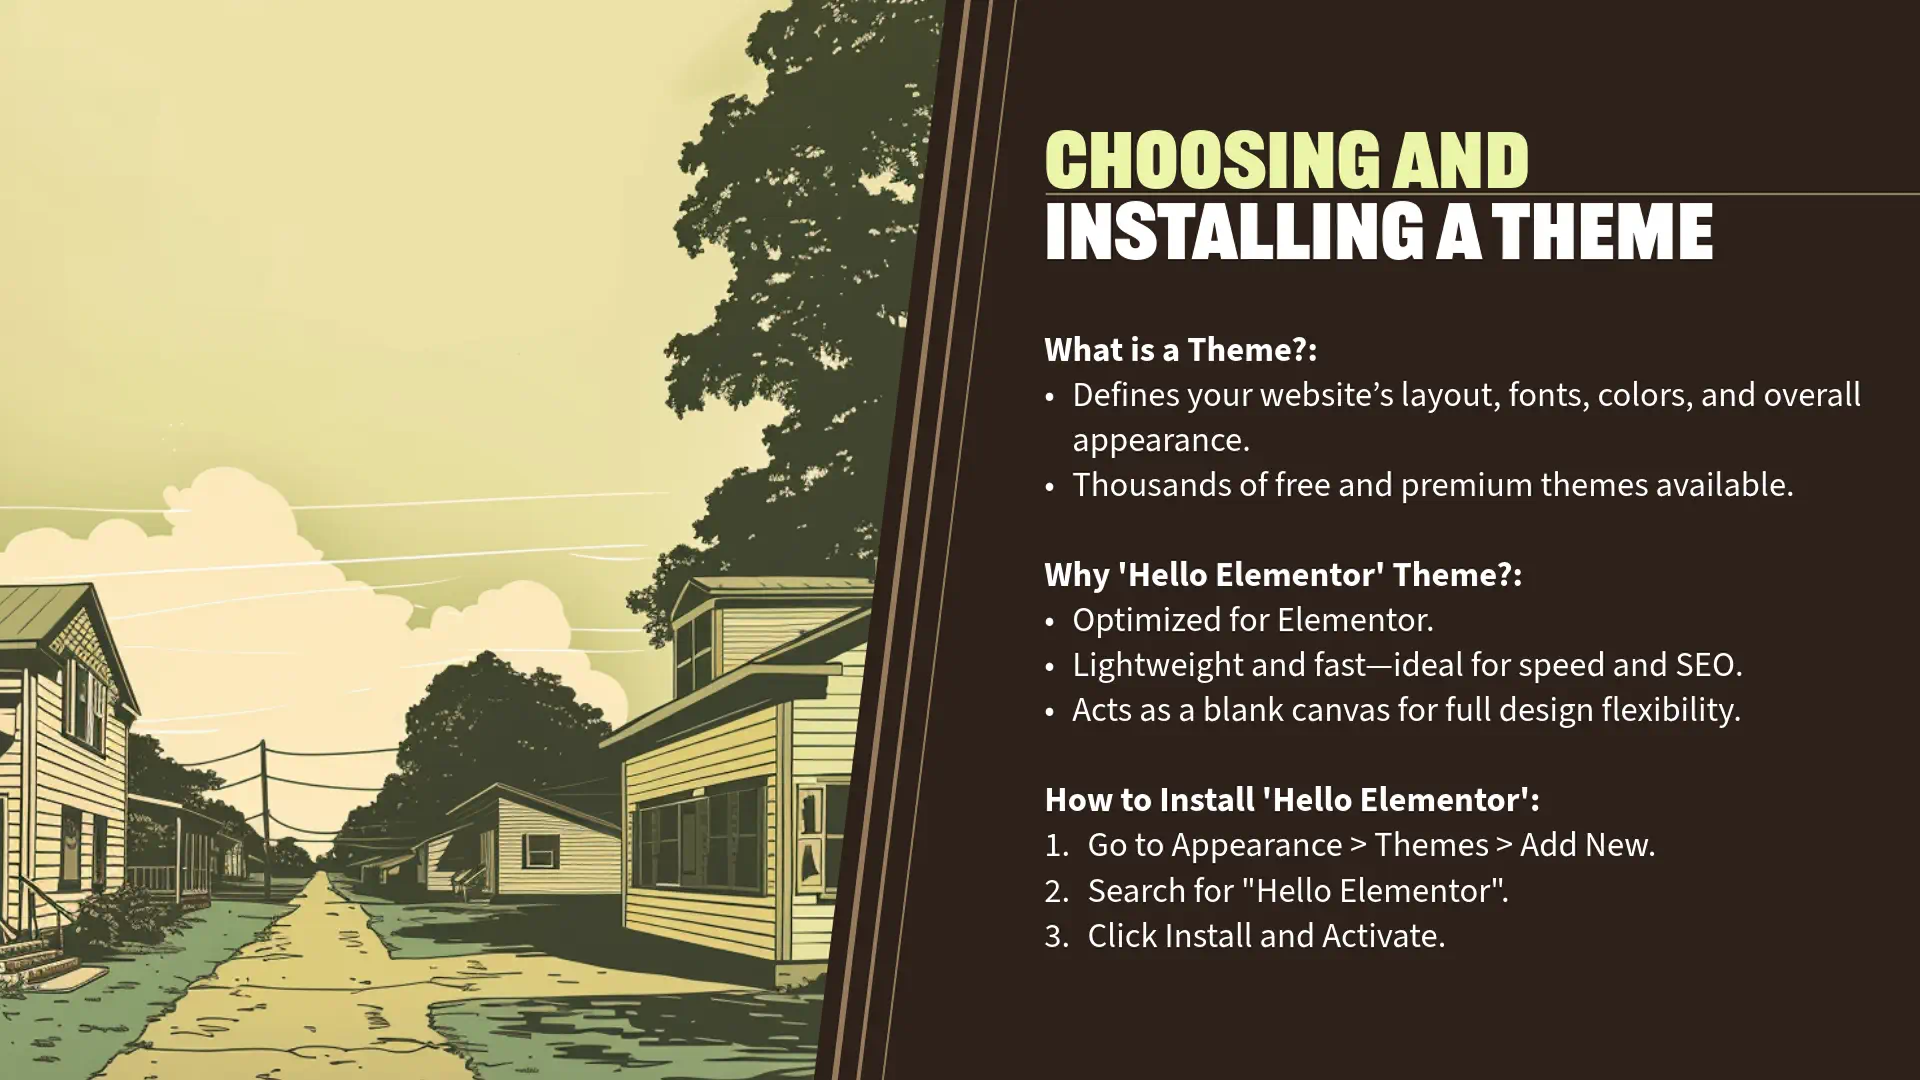
    What is a Theme?

    “Now that we’ve set up our WordPress site with the basic configurations, it’s time to focus on the appearance of your website. This is where themes come into play.

    • Definition:
      • A WordPress theme is a collection of templates and stylesheets that define the visual appearance and layout of your website.
      • It controls aspects like colors, fonts, page layouts, and overall styling.
    • Purpose:
      • Themes allow you to change the look and feel of your site without altering the underlying content or functionality.
      • They provide a foundation for your site’s design, which you can further customize to match your brand or personal style.
    • Flexibility:
      • With thousands of free and premium themes available, you can choose one that fits your specific needs.
      • Themes cater to various industries and design preferences, from minimalist blogs to feature-rich e-commerce sites.

    Why Choose ‘Hello Elementor’ Theme?

    • Optimized for Elementor:
      • ‘Hello Elementor’ is a lightweight, minimalist theme developed by the Elementor team.
      • It’s designed to work seamlessly with the Elementor page builder, providing a blank canvas for your creativity.
    • Performance:
      • Being extremely lightweight, it improves your site’s loading times, enhancing user experience and SEO performance.
    • Customization:
      • It allows you to build every part of your site using Elementor, giving you complete design freedom without unnecessary bloat.

    Installing the ‘Hello Elementor’ Theme

    “Let’s walk through the steps to install and activate the ‘Hello Elementor’ theme on your WordPress site.

    Step 1: Navigate to the Themes Section

    • From your WordPress Dashboard, go to ‘Appearance’ > ‘Themes’.
      • This page displays all the themes currently installed on your site.
      • You’ll notice a few default themes provided by WordPress.

    Step 2: Add a New Theme

    • Click on the ‘Add New’ button located at the top of the Themes page.
      • This takes you to the WordPress Theme Directory, where you can search and install themes directly from your dashboard.

    Step 3: Search for ‘Hello Elementor’

    • In the ‘Search themes…’ field on the right side, type ‘Hello Elementor’.
      • The ‘Hello Elementor’ theme should appear in the search results.
      • You can identify it by its simple design and the Elementor logo.

    Step 4: Install the Theme

    • Hover over the ‘Hello Elementor’ theme thumbnail.
      • You’ll see two options: ‘Preview’ and ‘Install’.
    • Click the ‘Install’ button.
      • WordPress will download and install the theme onto your site.
      • This process usually takes just a few seconds.

    Step 5: Activate the Theme

    • After the installation completes, the ‘Install’ button will change to an ‘Activate’ button.
      • Click ‘Activate’ to make ‘Hello Elementor’ your active theme.
    • Alternatively, you can return to ‘Appearance’ > ‘Themes’, find ‘Hello Elementor’ among your installed themes, and click ‘Activate’ there.

    Step 6: Verify Activation

    • Once activated, ‘Hello Elementor’ will appear as your current theme at the top of the Themes page.
      • You can click on ‘Customize’ to access the Theme Customizer, although with ‘Hello Elementor’, most customization is done using the Elementor page builder.

    Step 7: Optional – Delete Unused Themes

    • It’s good practice to delete any themes you’re not using to keep your site clean and secure.
      • In ‘Appearance’ > ‘Themes’, hover over any unused theme.
      • Click on ‘Theme Details’, then click the red ‘Delete’ button in the bottom right corner.

    Engagement Opportunity

    “Installing a theme is a significant step because it sets the visual tone for your entire website.

    • Reflect on Your Design Vision:
      • Consider the style and layout that best represent your brand or personal aesthetic.
      • Think about color schemes, typography, and the overall mood you want to convey.
    • Benefits of ‘Hello Elementor’:
      • Its minimalist approach means there are no design constraints, allowing you to build your site exactly as you envision with the Elementor page builder.
      • It’s an excellent choice for beginners and professionals who want full control over their site’s design.

    Personal Insights

    “For our Applegate Pumpkins website, choosing ‘Hello Elementor’ was a strategic decision.

    • Design Freedom:
      • It provides a blank canvas to create custom layouts that showcase the beauty of the Applegate Valley and the spirit of the harvest season.
    • Performance Advantage:
      • The theme’s lightweight nature ensures fast load times, which is crucial for keeping visitors engaged and improving search engine rankings.
    • Seamless Integration:
      • Since we’re using Elementor to design our pages, having a theme built by the same team ensures compatibility and a smoother design experience.

    Visual Demonstration

    “Let me show you how easy it is to install ‘Hello Elementor’:

    1. Navigate to Themes:
      • On the left-hand menu, click ‘Appearance’, then ‘Themes’.
    2. Add New Theme:
      • Click the ‘Add New’ button at the top.
    3. Search and Install:
      • In the search bar, type ‘Hello Elementor’.
      • Once it appears, click ‘Install’.
    4. Activate the Theme:
      • After installation, click ‘Activate’.
    5. Confirmation:
      • You’ll see a confirmation message, and ‘Hello Elementor’ will now be your active theme.

    Transition to Next Section

    “Great! We’ve successfully installed and activated the ‘Hello Elementor’ theme, setting the stage for designing our website.

    In the next section, we’ll install and activate the Elementor plugins, which will enable us to use the powerful drag-and-drop editor to build our pages with ease and creativity.

    Let’s move forward to unlock the full potential of Elementor and bring our website vision to life.”